New Product Introduction Process (NPI): the 7 Stages Explained

- Key Takeaways
- What is the NPI Process?
- The Seven Steps of the NPI Process Flow
- Stage 1: Ideation
- Stage 2: Feasibility
- Stage 3: EVT
- Stage 4: DVT
- Stage 5: PVT
- Stage 6: Launch
- Stage 7: Post-Launch Improvement
- How to Measure NPI Success
- Why NPI Should Be Your First Step in Development
- The NPI Process in Partnership with a Contract Manufacturer
- How Komaspec Supports Your New Product Introduction Process
The New Product Introduction process (NPI) is the structured approach to ideate, design, test, build, and release a product to the market. Getting a concept onto the factory floor involves a lot of moving parts, and NPI organizes them into one clear sequence.
You might see New Product Introduction broken down into five stages, or stretched out to six or seven. Some organizations even blend it entirely with their general product development cycle.
For clarity, this article will guide you through seven distinct phases: Ideation, Feasibility, Engineering Validation Test (EVT), Design Validation Test (DVT), Production Validation Test (PVT), Launch, and Post-Launch Improvement.
Key Takeaways
Key Takeaways
NPI covers the entire path from idea to market. It starts with defining the business goals behind the concept, moves through prototyping and iterative validation, and carries the product through manufacturing and into the go-to-market plan.
Products must clear multiple rounds of validation. Each tests something different — engineering function, real-world durability, and the manufacturing process itself.
Success gets measured on two fronts, production and business. Manufacturing KPIs include first-pass yield, lead times, and defect rates. Business KPIs are time-to-market, revenue, and customer adoption.
Launch isn't the finish line. Post-Launch checks whether the product actually hit the business goals, and that feedback loop is what makes the next NPI cycle faster and cheaper.
Table of Contents
- Key Takeaways
- What is the New Product Introduction Process?
- The Seven Steps of the New Product Introduction Process Flow
- Stage 1: Ideation (or Define)
- Stage 2: Feasibility
- Stage 3: EVT (Engineering Validation Test)
- Stage 4: DVT (Design Validation Test)
- Stage 5: PVT (Production Validation Test)
- Stage 6: Launch
- Stage 7: Post-Launch Improvement
- How to Measure NPI Success
- Why NPI Should Be Your First Step in Development
- The New Product Introduction Process in Partnership with a Contract Manufacturer
- How Komaspec Supports Your New Product Introduction Process
- FAQs
What is the New Product Introduction Process?
Launching a new product takes a lot more than just having the idea, sketching it out, and sending it off to be made. Market fit has to get figured out. Positioning, testing, validation, getting the factory ready – there's a real string of work behind all of it. NPI is basically a list of all the important steps, so nothing is forgotten when launching a new product (or a new iteration of an existing one).
To carry it through each stage, you need a cross-functional team behind it. This group usually pulls in a project manager along with people from engineering, finance, marketing, key stakeholders, and whoever's in direct contact with the contract manufacturers or outside developers on the project.
NPI is sector-agnostic. The same framework applies across products like medical equipment, consumer electronics, food and beverage, and automotive components, with the primary difference being the depth of each stage. A low-volume specialist product demands more rigorous validation and tighter quality controls, whereas a high-volume production run requires a heavier PVT than a niche manufacturer will ever need.
We already have a detailed article explaining what NPI is and how it differs from NPD. This article focuses specifically on the process stages.
The Seven Steps of the New Product Introduction Process Flow
Stages of the New Product Introduction process involve moving through an orderly process to identify needs within the market to determine the feasibility of producing the product, and to involve the manufacturing team early on to identify any design flaws prior to too much investment being made.
From there, the project goes through a sample build, validation, and process qualification until the actual orders come in, when everything is in place and the design is locked in.
Different stage counts, labels, and gate criteria exist across industries and frameworks. The underlying activities, however, are consistent. Every serious approach moves through concept definition, feasibility assessment, design validation, production validation, and launch, in that order.
Some divide the process into broad phases separated by formal management decision points, with a go/no-go call at each one.
Others add more granular validation requirements, particularly in regulated industries where compliance documentation drives the stage structure.
Some compress or run stages in parallel to reduce time-to-market, trading formality for speed.
Others break validation into multiple distinct build-and-test cycles, each answering a progressively more specific question about the product.
Modern NPI is best understood as a 7-phase process. Each phase answers a distinct question and produces specific deliverables before the team moves forward, and has a clear output — a specific condition that has to be met before the project can move into the next phase.
| Stage | Question Answered | Key Activities | Gate Output |
|---|---|---|---|
| 1. Ideation (Define) | Is this product worth building? | Market research, customer feedback, competitive analysis, ideation techniques | Validated business case and product requirements |
| 2. Feasibility | Can this be built profitably at scale? | Technical and manufacturing assessment, supplier readiness, cost modeling, risk assessment | Go or no-go report |
| 3. EVT | Does the engineering design actually work? | First prototype builds, DFM review, functional and performance testing | Working prototype with stable BOM |
| 4. DVT | Does the product hold up under real-world conditions? | Environmental, reliability, and regulatory testing, build-test-iterate cycles | Design freeze decision |
| 5. PVT | Can the manufacturing process produce it consistently at scale? | Pilot production runs, yield tracking, process documentation | Qualified production line |
| 6. Launch | Is the product ready to sell at volume? | Production ramp-up, quality control, commercial go-to-market activities | Stable production at full volume, performance tracking against targets |
| 7. Post-Launch Improvement | Is the product performing as intended in the market? | Quality, cost, and sales monitoring, lessons learned review | Feeds findings into the next NPI cycle |
Stage 1: Ideation (or Define)
Ideation, or Define, is the NPI phase where the product concept gets its foundation.
However, before the process of design and engineering kicks off, the team has to be armed with a proper understanding of the market and the customer in question in order to evaluate whether the idea can stand on its own feet or not. This step involves conducting market research, getting proper feedback from potential customers and evaluating the competitive landscape thoroughly.
Many times, the project doesn't start with a clear concept at all. Instead, it starts with a reading of the audience's pain points, and the product gets sketched around that later.
Either way, turning that raw input into something workable takes a process. Ideation techniques like mind mapping and design thinking help generate a wide range of concepts early, and from there the team narrows down based on actual customer demand and technical feasibility.
This is also where leadership sponsors the idea and the project manager is appointed.
At this first step, the team works on the documents that the rest of the process depends on:
- Product requirements document. Functional and performance requirements, developed with input from all stakeholders and reviewed before the team moves forward.
- Preliminary bill of materials (BOM). A high-level component list, enough to inform early cost and supply chain thinking.
- Business case. Target market, expected production costs, margin goals, rough ROI, and a clear definition of what success looks like, and what failure looks like.
- Initial project timeline. Dates, budget, and key milestones, with enough detail to hold the team accountable at each gate review.
Gate output: you are ready to move forward once you have the answer to this question: is this product worth building? If the business case doesn't hold up here, it won't hold up later.
Stage 2: Feasibility
Feasibility is the analysis to understand if the product can be built profitably at scale.
The Define stage established what the product needs to do. This phase establishes whether doing it is actually viable, technically and commercially.
The assessment covers several fronts:
- Technical feasibility. The design needs to be manufacturable with available equipment and processes. Tooling constraints and material limitations get identified here, before development begins.
- Manufacturing capability. The team assesses whether the production facility can meet volume requirements, or whether a contract manufacturer needs to be brought in.
- Supplier readiness. Suppliers are evaluated on lead times, volume capacity, and quality controls. If gaps exist, they surface here rather than during production.
- Cost modeling. Tooling, labor, raw materials, and overhead get measured against the margin targets set in the first step.
- Risk assessment. Major failure modes are identified and logged. Supply chain gaps, design uncertainties, production constraints, and component availability issues all go into a risk register.
Bring in the suppliers from the get-go rather than later on. This will help you make better sourcing decisions, provide you with more accurate cost estimation, and reduce lead times. Your suppliers will be able to advise you on the availability of components and on overall manufacturing planning.
Gate output: a go or no-go report. If the feasibility report surfaces problems the team cannot resolve within budget and timeline, the project stops here. And that is not a failure; that is the New Product Introduction process working correctly.
Stage 3: EVT (Engineering Validation Test)
EVT is where the product becomes real for the first time. The goal is proof that the engineering design actually works.
Applying Design for Manufacturability (DFM) principles here can catch a lot of problems early, like geometry issues, inefficient material choices, and assembly constraints. These are the kind of things that otherwise only show up once there's a physical part in hand.
Simulation and CAD analysis go pretty far, but they hit a wall at some point. Some problems just don't show themselves until you're actually holding the component. DFM will be applied in loops at other validation stages as well, and after the prototyping evaluation.
Teams build the first integrated units using early BOM versions, often with temporary or substitute components where final parts aren't available yet. Prototypes at this stage are produced using fast-turnaround manufacturing methods such as CNC machining for structural and mechanical parts, 3D printing and laser sintering in plastic or metal for geometry validation, and vacuum casting for plastic parts that need to approximate final material properties.
Typical EVT activities include:
- First full system prototype builds with initial BOM
- Functional validation across core product features
- Early firmware and software integration (where applicable)
- Initial performance testing against product requirements
- Engineering change logging and BOM revision tracking
The more DFM work done upfront, the fewer surprises the physical build produces. Changes will happen — that is what prototypes are for. But a well-prepared EVT makes a complete or near-complete design overhaul less likely.
Gate output: a working prototype that performs against the product requirements, with engineering changes logged and a BOM stable enough to carry into DVT.
Stage 4: DVT (Design Validation Test)
DVT is where the design stops being flexible. The goal is to confirm the product meets every requirement before the team commits to hard tooling, production equipment, and the costs that come with them.
By this stage, the core features and basic concept are already perfectly defined. DVT exists because definition is completely different from validation, and the product needs to prove it survives real-world conditions, meets regulatory requirements, and holds up across repeated use.
That proof comes through successive build-test-iterate loops like DVT1, DVT2, DVT3, etc., until the product consistently passes. Engineers debug, refine tolerances, and address failures between each round because changes are fully expected here. Once the design freeze is called at the gate, revisions become significantly more expensive.
Testing at this stage is comprehensive:
- Environmental testing across temperature ranges, vibration, humidity, and dust or water ingress.
- Reliability testing to confirm the product holds up consistently across its full life cycle.
- Safety and regulatory certification, with the compliance documentation the target market requires.
- Beta testing or pilot programs that get real customer feedback before the wider launch.

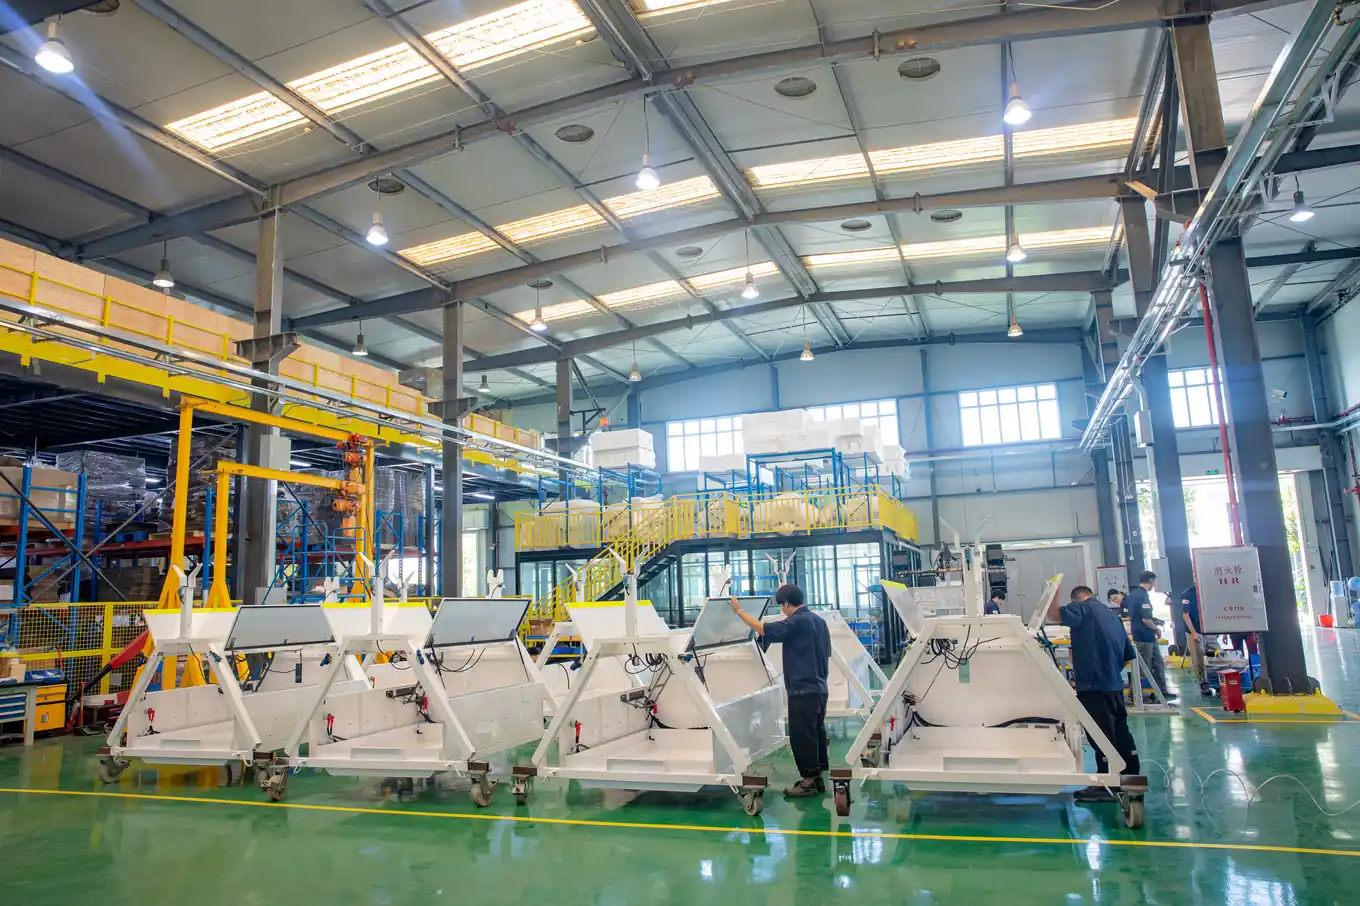
Stage 5: PVT (Production Validation Test)
PVT shifts the focus from the product to the process.
The design is locked. The question now is whether the manufacturing operation can produce it consistently, at scale, within quality targets. This NPI stage runs pilot production using real production tooling, live manufacturing lines, trained operators, and the final supply chain.
Simulated conditions are no longer sufficient. PVT needs to reflect actual production as closely as possible, because any gap between the pilot and the real run is a risk that surfaces during mass production.
Key outputs from PVT are:
- Pilot build results and yield metrics
- Validated and qualified production line
- Confirmed process documentation and work instructions
- Final production BOM aligned with approved suppliers
- Supply chain readiness confirmation
Gate output: qualified production line. If yield metrics meet targets and the process runs cleanly, the team has what it needs to move into full production.
Stage 6: Launch
When the product reaches this stage, the heavy engineering lift is already behind it, and the focus shifts to getting it sold.
With the design validated, production-ready, and the supply chain in order, a series of parallel actions kicks off to bring everything together:
- Production scales up
- The commercial go-to-market strategy gets underway
- Logistics operations begin
From a manufacturing standpoint, this stage is about ramp-up execution. Production volumes increase to meet demand, and the operation needs to hold quality consistently as output scales.
That requires more than a ready production line. Work instructions, standard operating procedures, and process documentation all need to be finalized and distributed before volume increases. Operators need to be trained on the quality controls and inspection criteria that apply to each batch.
Activities that run in the launch stage include:
- Continuous quality control and product inspection at the factory
- Final safety and regulatory review before commercial shipment
- Packaging evaluation and confirmation
- External training for sales teams, dealers, and distributors
- Manuals, catalogues, and pricing documentation finalized and distributed
- Supply chain partners confirmed on volume commitments and delivery schedules
Stage 7: Post-Launch Improvement
The job isn't finished just because the product hit the shelves. That's when Post-Launch starts.
This step keeps the evaluation going, checking whether the product is actually performing as intended, and where it isn't, whether the fix sits in production, in branding, in positioning, or somewhere else entirely.
A month or two into sales, it's time to start measuring whether things are tracking against the business goals set back in the first step of the New Product Introduction process, and if they're not, figuring out what needs to change.
A few things get evaluated here, including whether:
- Quality is holding up as expected after the first batches
- Customers are enjoying the product
- Production is staying efficient
- Production costs are holding steady
- The product is selling as well as projected
Post-Launch is a stage most teams skip, and it shows in the next product cycle. Once the product is on the market, the temptation is to move on. The teams that do that lose the data that would have made the next launch faster and cheaper.
A useful tool here is a structured lessons learned review. Some teams run it as a TGR/TGW exercise: Things Gone Right, Things Gone Wrong. The TGWs get root cause analysis and countermeasures for the next project. The TGRs get carried forward as standard practice, and both feed back into the next NPI cycle.
Key deliverables from this stage include:
- Lessons learned documentation
- Cost reduction plans based on production data
- Improvement backlog for the current product
- Lifecycle updates as the product evolves in the market
NPI is not a straight line with a defined end point. Post-Launch closes the loop, connecting live product performance back to the next round of development.
How to Measure NPI Success
A product reaching the market on time is not, by itself, a measure of success.
The New Product Introduction process produces two categories of outcomes: manufacturing performance and business performance. Both need to be tracked, and they answer different questions for different parts of the organization.
Manufacturing KPIs sit with the production and engineering teams. They measure how well the process itself ran:
- First pass yield across pilot and production builds
- Defect rates and return rates post-launch
- Cycle time against the original project timeline
- Cost performance against the targets set in the first stage of NPI
- Number of engineering changes required after design freeze
Business KPIs sit with product management, marketing, and leadership. They measure whether the product is delivering on its commercial purpose:
- Sales revenue against projections
- Market share gained since launch
- Customer adoption rates in the target segment
- Post-launch survey results and customer satisfaction scores
- Speed to market relative to competitors and internal targets
Speed to market deserves particular attention. A delayed launch means missed market windows, ceded ground to competitors, and revenue that never materializes.
Almost half of product launches suffer from this problem, according to Gartner. The New Product Introduction process exists in part to prevent that, which is why time-to-market belongs on the list of KPIs worth tracking. It ties process performance directly back to the business outcome that actually matters.
Quality deserves the same level of attention, and it can't stop getting watched once the initial production run looks clean. This is one of the biggest mistakes when manufacturing overseas, because a manufacturer can pass qualification, ship a few solid early batches, and still slip once volume increases.
Why NPI Should Be Your First Step in Development
The earlier the process begins, the more room you have to catch problems before they become expensive. Design changes at the concept stage cost a fraction of what they cost after tooling has started.
The benefits of starting the New Product Introduction process as early as possible include:
- Faster time to market. A structured NPI approach ensures that there is no back-and-forth slowing down progress, and reduces the risks of reworks due to preventable design or manufacturing flaws.
- Lower development costs. Early involvement of manufacturing and supply chain reduces late design changes, repeated validation testing, and wasted prototypes.
- Lower production costs. Design for Manufacturability (DFM) review during the design phase checks the product against assembly and reliability standards too, pushing it toward the most efficient production possible. That cuts labor time and material costs once production hits real volume.
- Higher product quality. Multiple gate reviews across the process give the team a real chance to dig into every angle that could make the product better: usability, ergonomics, and whatever else matters before it ships.
- Smoother manufacturing ramp-up. When the contract manufacturer is looped in from the start, the production line is ready before the first run.
- Reduced risk of launch failure. Structured validation stages surface problems at the right time, when they're still manageable.
- Easier scale-up. A process validated at low volume is far easier to scale than one that was never properly tested.
- Better supplier readiness. Bringing suppliers in early gives them time to qualify components, lock down lead times, align on quality standards, and flag sourcing risks before production even starts.
The New Product Introduction Process in Partnership with a Contract Manufacturer
Most companies don't have the in-house manufacturing capability to take a product through NPI on their own. A contract manufacturer fills that gap, and how early you bring them in determines how much value they actually add.
Bringing a contract manufacturer early is one of the highest-impact decisions in the whole process. They can contribute to DFM reviews before the design gets locked, flag timeline assumptions that won't hold up before they turn into schedule problems, and catch high-risk design features before anyone's cutting tooling.
Partnership with a vertically integrated turnkey manufacturer makes prototyping, low and mid-volume runs, and the eventual scale into mass production a lot more straightforward.
Sheet metal fabrication, CNC machining, injection molding, assembly, and quality control all under one contract mean the handoffs between production stages never leave the building. Things are less likely to fall through the cracks, lead times are shorter, and there's a single point of contact responsible for the whole project, which makes accountability a lot cleaner than managing a network of separate suppliers.
And since the manufacturer is running the production facility, the business doesn't need to own one — which means no capital expenditure on equipment, no direct personnel costs, and the ability to scale output up or down without fixed overhead.
In other words, the manufacturer takes on the operational complexity while the business stays focused on developing the product being introduced to the market.
To get the most out of that relationship during NPI, a few things matter:
- Define criteria upfront, with documented go/no-go conditions at each stage.
- Align documentation standards early, covering drawings, 3D models, test plans, and regulatory requirements.
- Define measurable success milestones before production begins, including target first-pass yield and landed unit cost targets.
- Involve the manufacturer in the process as early as possible, particularly for complex products.
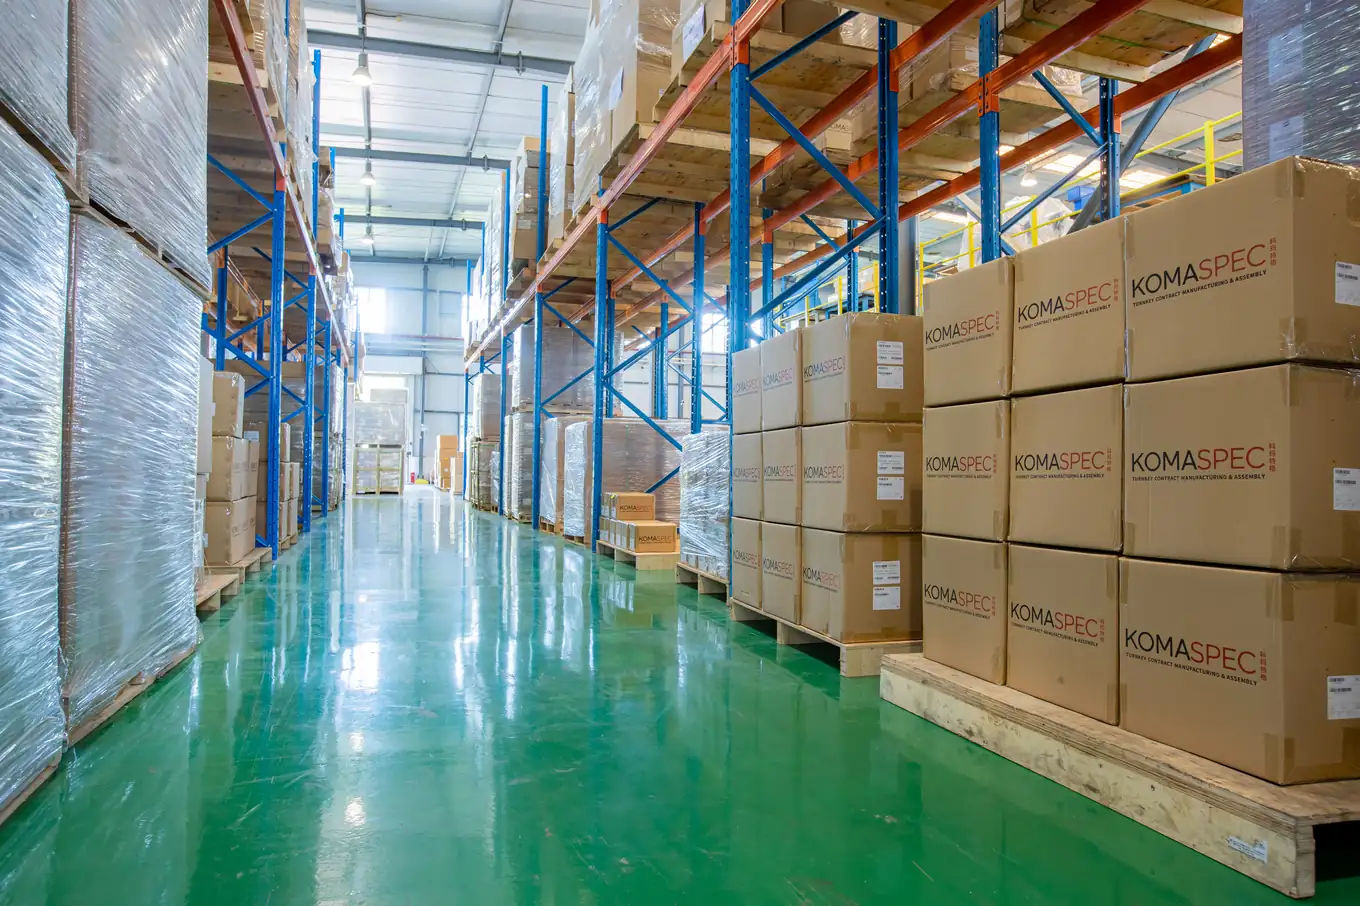
How Komaspec Supports Your New Product Introduction Process
Komaspec supports the full NPI cycle across facilities in China, Vietnam, and Mexico. Here's what that looks like in practice:
- Design for Manufacturability reviews covering cost reduction, error proofing, design localization for East Asian production, and reliability.
- Prototyping using 3D printing, laser sintering, vacuum casting, and CNC machining for fast iteration and early validation.
- Pilot production where manufacturability issues get debugged, jigs and fixtures get validated, and every issue gets clearly documented.
- A full documentation stack, including multi-level BOMs, detailed drawings, assembly instructions, and quality records like FAIs, PPAP, CpK, FMEA, and IQC.
- Turnkey production capacity to carry the product past NPI, scaling into hundreds of thousands of units a year without breaking stride.
With over 2,500 projects completed across product types, complexity levels, and production volumes, we've run NPI in just about every configuration it comes in.
If you're bringing a new product to market, talk to our team to discover how we can help you reach your business goals.
FAQs
What is the difference between NPI and NPD?
New Product Development (NPD) is all about the upfront creative work: brainstorming, conceptualizing, and designing the product.
NPI is what happens next: prepping the factory floor, securing the supply chain, validating the product, defining branding and positioning, and actually launching it so it can sell at scale.
NPD and NPI usually run in parallel. Waiting to finish the entire product development process before thinking about manufacturing risks discovering too late that the project can't actually be built within the available timeframe and budget. All the time spent refining the perfect product can end up wasted.
What does the NPI phase mean?
NPI is the systematic process of converting an idea or product concept into an actual, manufacturable and marketable item. The stages involved in the process include: defining the concept, feasibility, prototyping, design and manufacturing validation, launch, and post-launch review for the next iteration.
Each step exists to catch problems while they're still cheap to fix — design flaws, sourcing gaps, manufacturability issues — before they turn into expensive ones further down the line.
What is necessary in a New Product Introduction schedule?
A good NPI plan considers the full path from an idea to mass production, not only the design phases. This includes time allocation for feasibility studies, various stages of prototype testing, qualification of the supplier, tooling, regulatory compliance (if necessary), and a pilot manufacturing run.
How long does the New Product Introduction process take?
It really depends on what's being built, how complex it is, and the industry it's going into.
A simple product with established manufacturing processes moves faster than something with custom tooling or regulatory certification involved. As a general range, six months to two years is a safe margin to plan around.
How much does the New Product Introduction process cost?
It is very difficult to provide an exact figure, but the NPI for a highly complex project in a demanding and regulated industry can exceed US$100,000.
The figures vary depending on factors such as the complexity of the product in question, the number of parts and assembly requirements, the target audience, and even the country where it is being produced.
To give you an idea of where the money goes: conception and planning, industrial design, prototyping, electromechanical validation, packaging design, tooling, mass production, certifications and testing, minimum order quantities for the first production batch, shipping, and import duties.
Add up the cost of all these items, and you'll have the total cost of the New Product Introduction process.