Design for Manufacturing Principles: DFM Basics and Guidelines
- Key Takeaways
- What is DFM?
- The Goals of DFM
- The Key Principles of DFM
- Best Practices
- Common Mistakes
- DFM Strategy
- DFM Principles Checklist
- Bring Your Designs to Life with Komaspec
Design for Manufacturing anchors production capabilities in early product design. Engineers evaluate tolerances, geometries, material requirements, tooling, and other factors before they lock in geometries or buy raw stock. This early analysis prevents the capital waste of sending a flawed or unoptimized digital model to the factory.
The Design for Manufacturing principles serve to eliminate complexity, reduce friction, and to align the creative vision to the constraints of the chosen materials and manufacturing methods. This way, teams can launch products faster and assemble with significantly less effort on the factory floor, which ultimately drives down the final unit cost.
Applying the DFM process requires strict discipline. Every manufacturing method dictates specific rules—CNC machining, plastic injection molding, and sheet metal demand different guidelines, for instance—but universal principles still govern the entire board. Discover them in this guide.
Key Takeaways
- Simplify designs: Determine the areas of design that can be optimized. This means making changes that permit faster and simpler manufacturing, but will not affect the function and appearance of the parts.
- Apply the basic Design for Manufacturing principles: reduce part count, standardize components, set realistic tolerances, pick materials that are practical to work with, and minimize secondary processing. Each manufacturing process also has its own set of DFM guidelines.
- Match the process to the production volume: Certain processes are better for low-volume, while others are almost specific to mass production. Decide based on the annual output and calculate the break-even point that justifies tooling.
- Collaborate with your manufacturer: Partner with your supplier early in the process, so that you can use their expertise in identifying any design problems or alternatives in materials and manufacturing processes.
Table of Contents
- Key Takeaways
- What is Design for Manufacturing?
- The Goals of Design for Manufacturing
- The Key Principles of Design for Manufacturing (DFM)
- Best Practices in Design for Manufacturing
- Common DFM Mistakes
- Strategy for the Design For Manufacturing Process
- Design for Manufacturing Principles Checklist
- Bring Your Designs to Life with Komaspec
What is Design for Manufacturing?
Design for Manufacturing (DFM or Design for Manufacturability) introduces fabrication constraints early in the design phase. These principles force engineers to confront factory limits from day one.
Teams run this review to ensure every part matches the specific machines, manufacturing processes, and materials required for actual production. Catching these conflicts early prevents unbuildable designs from ever reaching the factory floor.
The resulting component fulfills its functional requirements and remains highly efficient to produce.
Examples of problems that the Design for Manufacturing principles solve are:
- Specifying specialized fabrication processes or materials that are unavailable locally.
- Requiring dimensional tolerances that standard production machinery simply cannot repeat.
- Specifying too many tight tolerances on a part, even when this does not contribute to its proper functioning.
- Designing parts that require custom tooling setups or slow, manual interventions.
DFM identifies these processing bottlenecks at the very beginning of the development timeline, so CAD files can be modified before pilot runs.
The Main Benefits of DFM
Ultimately, DFM delivers an optimized design so that a product fulfills its functional requirements while remaining highly efficient to produce
Applying the Design For manufacturing principles results in benefits such as:
- Lower manufacturing costs
- Higher quality products
- Shorter time-to-market
- Reduced material waste
- Increased efficiency
- Better sourcing flexibility
- Predictable production scaling
- Simplified inspection procedures
The Goals of Design for Manufacturing
A Design for Manufacturing review or feedback works toward three main goals:
- Simplifying production
- Reducing costs
- Maintaining product quality
The first goal is to streamline the manufacturing process itself. This is achieved by reducing the number of individual parts in a design whenever possible, minimizing the number of machine setups (thereby avoiding positional stack-up errors that may occur), and eliminating secondary processes that do not contribute to the product's appearance or functionality.
The second goal is to reduce costs. The DFM framework forces teams to analyze exactly where capital is deployed, tracking costs with material procurement and manufacturing runtime. The objective is to find the most efficient solutions in design, material choice and manufacturing methods, to strip waste entirely out of the bill of materials.
The third goal is to maintain product quality. The decisions made during DFM are not intended to cut corners in production, but to ensure that the manufacturing process remains inherently stable, repeatable, and cost-efficient. This is found when every design requirement serves a distinct functional purpose, allowing the factory to operate at its peak precision without struggling against an over-engineered technical package.
The Key Principles of Design for Manufacturing (DFM)
The Design for Manufacturing principles are guidelines that apply across all manufacturing processes. They compose a framework to analyze a design before it reaches the factory floor.
Simplification
Reduce design complexity to eliminate potential failure modes and lower production overhead. Fewer components mean less time spent on material tracking, fewer purchase orders, and shorter assembly cycle times.
Consider an automotive door handle assembly as an example. Older mechanisms contained separate metal parts, springs, levers, and pins. Modern designs consolidate everything into a single molded plastic module with living hinges and integrated snap clips.
To simplify a design, engineers must:
- Review every part in an assembly using strict elimination criteria.
- Check if a component moves relative to its adjacent parts during standard operation.
- Determine if the part must consist of an entirely different material for insulation or strength.
- Assess if the part must remain separate to allow for field maintenance or initial assembly access.
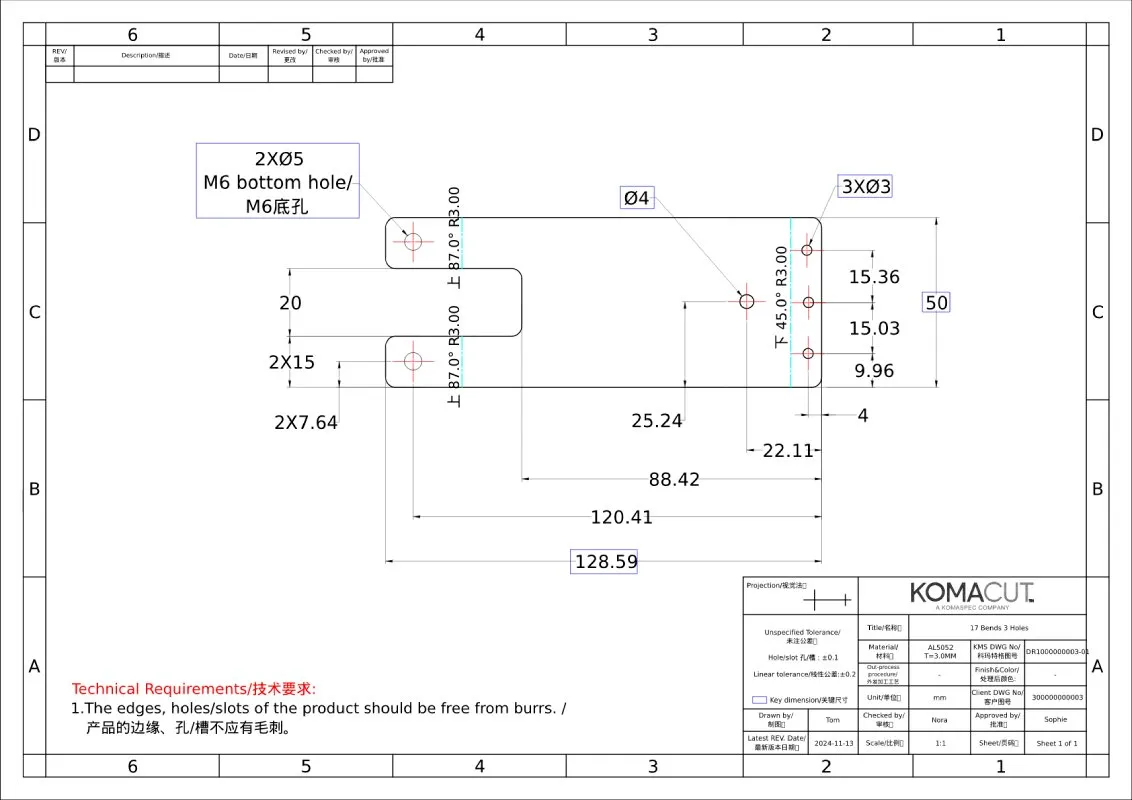
Standardization
Standardization means not custom-building every element of a product, as designing unique hardware often wastes capital and increases production complexity.
Whenever possible, and especially at low volumes, avoid custom tooling. Also, keep design features like fasteners, hole sizes, bend radii, wall thickness, among others, consistent throughout the project.
Some tips to apply this DFM principle are:
- Use common raw material forms like standard plate thicknesses and bar stock diameters.
- Whenever possible, restrict material choices to standard global grades that multiple local distributors stock regularly.
- Do not add multiple material grades to your project unless strictly necessary.
Material Selection
Choose material grades and raw forms that balance cost, global availability, mechanical performance, and manufacturability.
Consider CNC machining as an example. Harder metals increase cycle times by reducing tool life and requiring slower feed rates. So, if the part design allows it, switching to a more machinable alloy can cut costs without degrading performance.
Plastic injection molding operates on the exact same logic. Specialized resins provide extreme thermal resistance but complicate processing and drive up expenses.
The same is true for every other manufacturing method. Engineers must prove a product actually requires extreme performance before they reject standard, accessible materials.
To optimize material selection, consider:
- Material grades that match the selected production process without requiring exotic heat treatments.
- Market availability to ensure your selected material is available at the volume you need.
- Avoid over-specifying material performance characteristics, like marine-grade steel for indoor applications.
- If you are looking for a manufacturing partner, discuss your material needs with them beforehand and ask what material they recommend using.

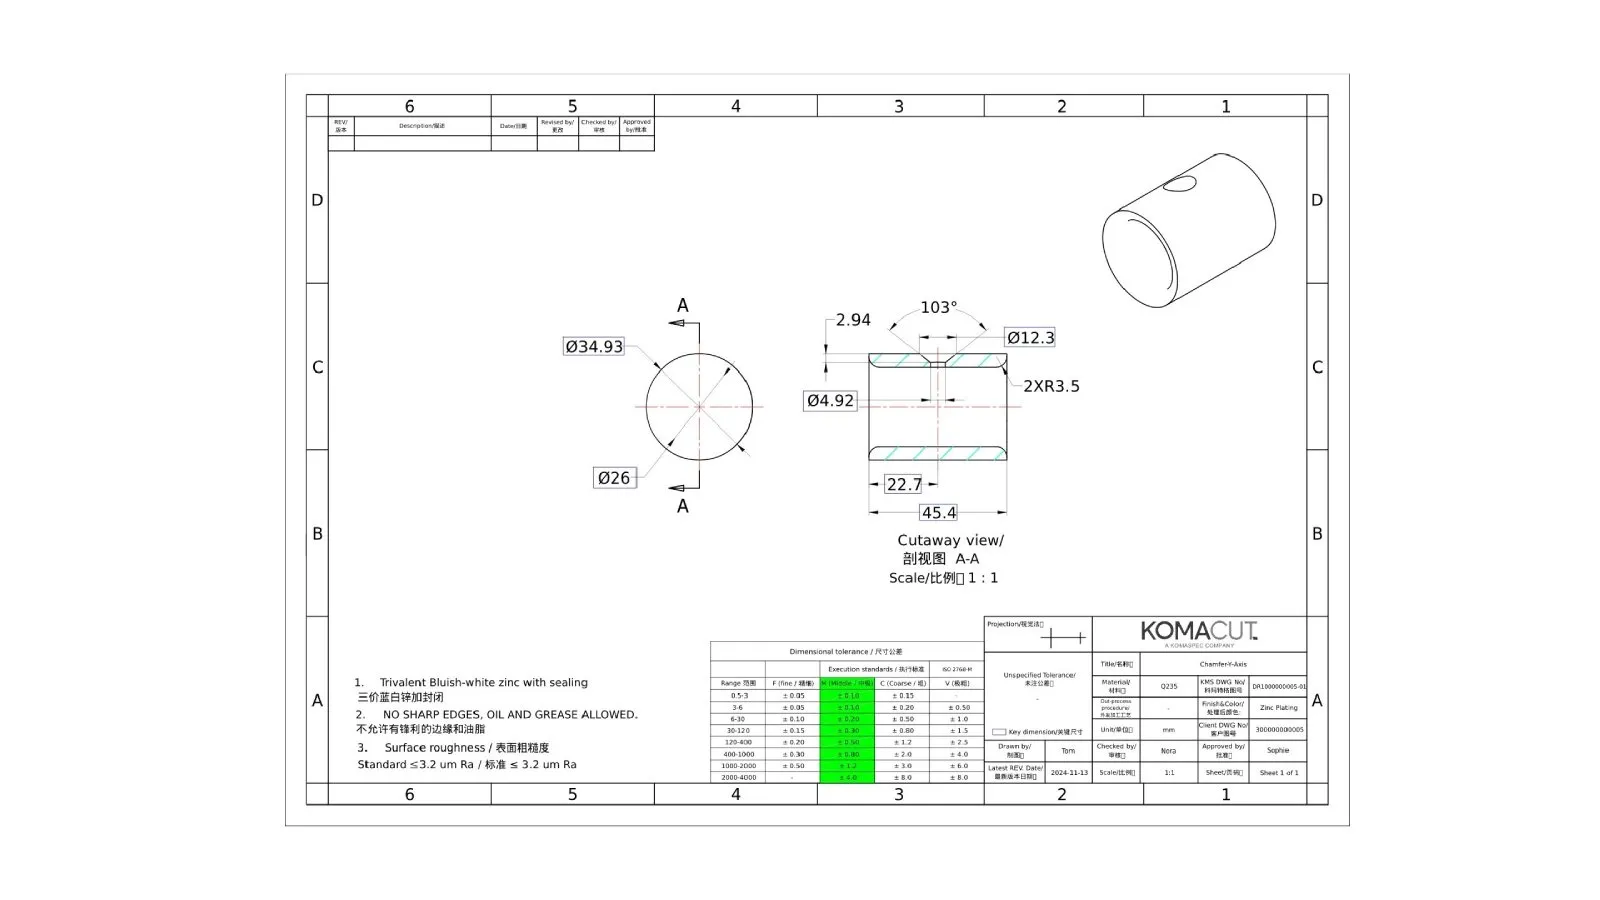
Tolerances Management
Specify dimensional tolerances based on strict functional necessity.
Over-tolerancing non-critical features spikes part rejection rates and extends inspection cycles. It forces factories to run secondary operations or deploy advanced machinery. These demands immediately drive up unit costs and stretch lead times.
Reserve tight tolerances for critical interfaces only.
To apply this DFM principle, do the following:
- Apply standard commercial tolerances to non-mating features and external cosmetic profiles.
- Use geometric dimensioning and tolerancing to clarify functional datum relationships.
- Conduct worst-case tolerance stack-up analyses across multi-part mechanical chains.
- Choose looser tolerances when a design can accommodate wider dimensional variance.
Environment Consideration
Components must withstand their actual operating conditions, including expected temperature ranges and chemical exposures. Engineering a part to survive extremes it will never encounter is textbook overengineering, and this miscalculation inflates material costs and drives up the final unit price for no practical benefit.
Agricultural equipment, for instance, often requires thick powder coatings to block abrasive mud. Specifying that same heavy-duty finish for a standard indoor device wastes capital.
To apply this Design for Manufacturing principle:
- Define the true operating environment including temperature ranges and humidity levels.
- Select finishes like anodizing or zinc plating based on realistic corrosion exposure calculations.
- Avoid combining dissimilar metals in humid environments to prevent galvanic corrosion.
- Match polymer selection to UV exposure realities to prevent premature material embrittlement.
Process Selection
Design for manufacturing principles require matching your manufacturing process to projected production volume and material requirements from the start.
Low-volume production is best suited for processes requiring minimal custom tooling, while high-volume production justifies the capital investment in dedicated molds or dies.
Designing parts for low-efficiency methods when volume requirements demand mass-production techniques creates a permanent scaling bottleneck that erodes profit margins.
To apply this Design for Manufacturing principle:
- Calculate the exact break-even volume where lower unit costs absorb custom tooling investments.
- Specify standard manufacturing methods to prevent vendor lock-in and force supplier competition.
- Audit factory capabilities directly. Suppliers must hold the exact machinery required to hit specified tolerances.
- Pivot the entire manufacturing strategy immediately when production volume forecasts shift.
Validation
Validation serves to confirm that both your tools and designs are ready for production at scale. While detecting flaws in digital simulations and CAD files is a necessary first step, it is rarely sufficient. Focusing on digital designs may lead you to ignore certain practical issues such as bad ergonomics or difficulty accessing tools that become obvious only after you have the actual part.
The importance of this becomes even more evident during the New Product Introduction (NPI) process, when you must make sure your designs are fit for manufacturing by testing prototypes that have been produced through rapid prototyping methods such as stereolithography and vacuum casting.
To apply this Design for Manufacturing principle:
- Do tolerance stack-up analysis to make sure that there is no dimensional variation among the components that affect assembly or function.
- Do an audit of molds, dies, and assembly jigs to confirm that the selected manufacturing process is capable of producing defect-free components.
- In prototype inspection, check for ergonomic and tool access issues.
- Refine the design once the prototype testing reveals any manufacturing variations and weaknesses in the design.
Minimize Secondary Operations
Design components to emerge from primary manufacturing in a finished or near-finished state. Every secondary operation—whether manual deburring, drilling, tapping, or coating—adds handling time and introduces a new failure point to the production line.
However, acknowledge that certain downstream operations are non-negotiable for functional or aesthetic requirements. For instance, anodizing aluminum is a common practice to improve functionality, even though it requires separate rack fixtures, chemical baths, and transport logistics.
The application of this Design for Manufacturing principle depends on your chosen manufacturing process and part intended use:
- For plastic parts, eliminate secondary surface treatments by specifying textured mold surfaces if possible.
- Design sheet metal parts with integrated tabs to avoid separate welding operations.
- For parts without cosmetic or functional surface requirements, specify an as-machined finish.
- Choose pre-finished raw materials like pre-galvanized sheet metal when corrosion risk allows.
Review
Conduct regular cross-functional design reviews at designated milestones throughout the product development process.
These reviews surface supply chain vulnerabilities and production bottlenecks before drawings are released. A late design change after tooling release can cost up to one hundred times more than an early modification during the drafting phase.
Document supplier feedback regarding machine limitations and alternative materials choices, and track action items to ensure all risks and flaws are resolved before production.
Best Practices in Design for Manufacturing
These best practices represent specific engineering behaviors that support the core Design for Manufacturing principles.
The DFM guidelines below are split into two categories: universal principles, which apply to any mechanical design, and process-specific guidelines, which provide technical parameters for common fabrication methods.
Note that every process has its own set of DFM directives, and that apparently simple concepts, like wall thickness, are never just an absolute numerical value, but rather a complex parameter that is influenced by the material and machinery used for production.
So, in short, consider the recommendations below as general rules, and always verify the guidelines with your manufacturing partner.
Universal Design for Manufacturing Principles
These rules apply regardless of whether your part is being milled, molded, or formed.
- Tolerance optimization: Tight tolerances should be applied to mating surfaces and critical components only. Otherwise, it increases time spent on manufacturing and testing. Too many tight tolerances also increase the risk of small deviations stacking up.
- Simplifying assemblies: Parts should have self-aligning mechanisms such as tabs, slots, and dowel pins if possible. These will eliminate the need for expensive assembly jigs.
- GD&T alignment: Establish a clear Geometric Dimensioning and Tolerancing (GD&T) datum structure. Define datums based on the physical features used to secure the part during manufacturing, and datums that reference large, easily accessible physical features.
- Proactive review: Always submit final designs to your manufacturing partner for a formal DFM review. Catching a geometric interference in CAD costs only engineering time, but catching it after tooling costs thousands.
- Minimize setups: Design the parts so that all critical dimensions can be measured in one direction only, thus eliminating expensive re-fixturing steps. Each time an operator unfixtures a part, turns it around, and refixtures it, production time and cost go up. Re-fixturing also adds positioning errors and compromises datum relationships.
- Surface finish: call out specific surface roughness values only on faces that require precise mechanical interactions.
Process-Specific Technical Guidelines
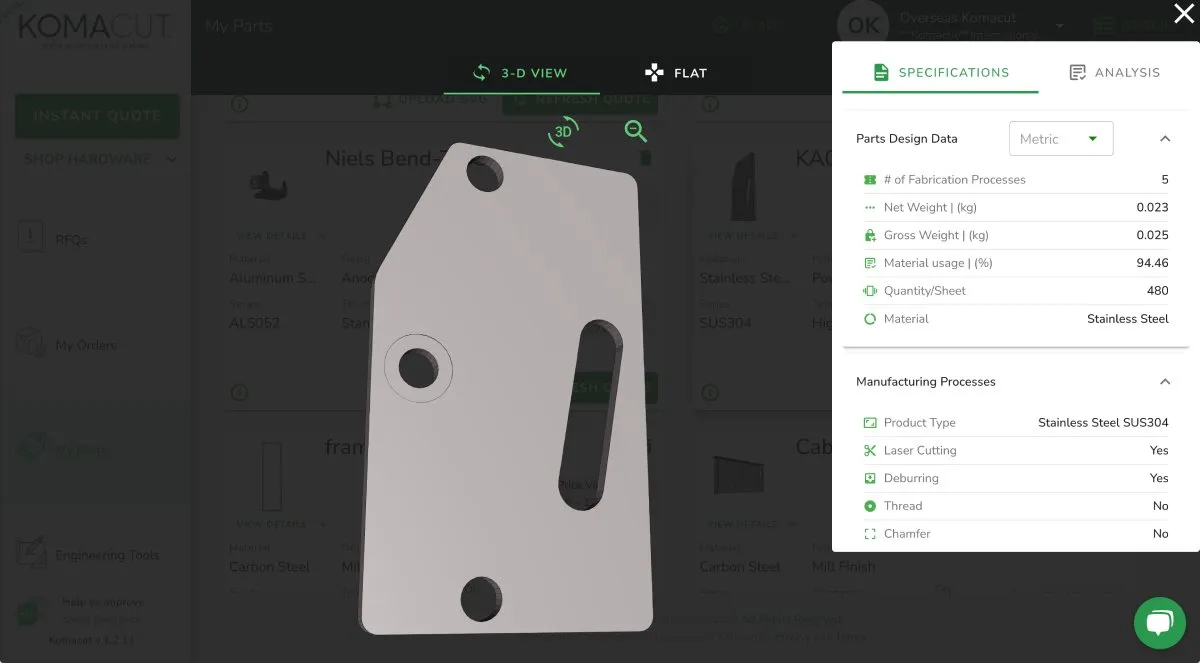
Use the table below to verify your design against the constraints of your chosen manufacturing method. Note that these are general guidelines that can vary depending on your supplier. For your project, confirm the specifications directly with them.
| Feature | CNC Machining | Injection Molding | Sheet Metal |
|---|---|---|---|
| Wall Thickness | Minimum 0.8 mm for metal parts | Keep between 2 mm to 4 mm (0.080″ to 0.160″) and uniform. | Uniform thickness, set by sheet gauge. |
| Internal Corners | Vertical radius ≥ 1/3 cavity depth; floor radius 0.5–1 mm | N/A | N/A |
| Draft Angles | N/A | Minimum 1º. | N/A |
| Bending | N/A | N/A | Minimum internal radius equal to material thickness |
| Setups | Access from one direction. | N/A | Minimize flange directions. |
Common DFM Mistakes
By applying the key Design for Manufacturing principles, you are already on the right path to avoid most mistakes.
Use this checklist of common pitfalls to audit your design and ensure you aren't introducing unnecessary friction before manufacturing your parts.
- Over-Engineering: Using extra fasteners, intricate geometries, or tight tolerance values simply due to caution expands your Bill of Materials and dramatically inflates the time required for assembly.
- Isolating Suppliers: Keeping manufacturing partners in the dark until the design is frozen almost guarantees over-specified drawings that are difficult to produce, resulting in costly, last-minute redesigns. A project rarely comes to the factory 100% ready for production at volume.
- Overlooking Tolerance Stackup: Evaluating components independently without considering the cumulative impact of variations results in inevitable failure once the manufacturing process introduces deviations from nominal dimensions.
- Process & Volume Mismatch: Designing for low-volume manufacturing processes in mass-produced products ensures that the scaling process becomes a problem right from the beginning; design must account for the specifics of processes such as injection molding or die casting.
- Specialized Material Selection: Choosing unusual material grades for standard applications causes unnecessary cost inflation along with an increased risk of long lead times due to limited availability.
- Secondary Processing Overlooking: Ignoring secondary processing tasks such as heat treating or coating adds hidden costs and additional sources of failure to your component design.
Strategy for the Design For Manufacturing Process
Integrate DFM early in the product lifecycle to maximize its financial impact on the project.
The conceptual design phase offers the greatest flexibility to change geometries and swap materials without penalty, so that is the perfect time to bring engineers and designers to the table. Together, establish the baseline production processes, then detail internal component features.
Another good idea is to address the most difficult manufacturing risks first while project scope remains adjustable.
Usually, to apply the Design for Manufacturing principles, teams follow a roadmap that looks like this:
- Concept definition: Establish the functional requirements and product architecture.
- Process capability match: Select the appropriate manufacturing method based on volume, material, part type and features, and geometric complexity.
- DFM rules execution: Apply the Design for Manufacturing principles and best practices to the CAD model.
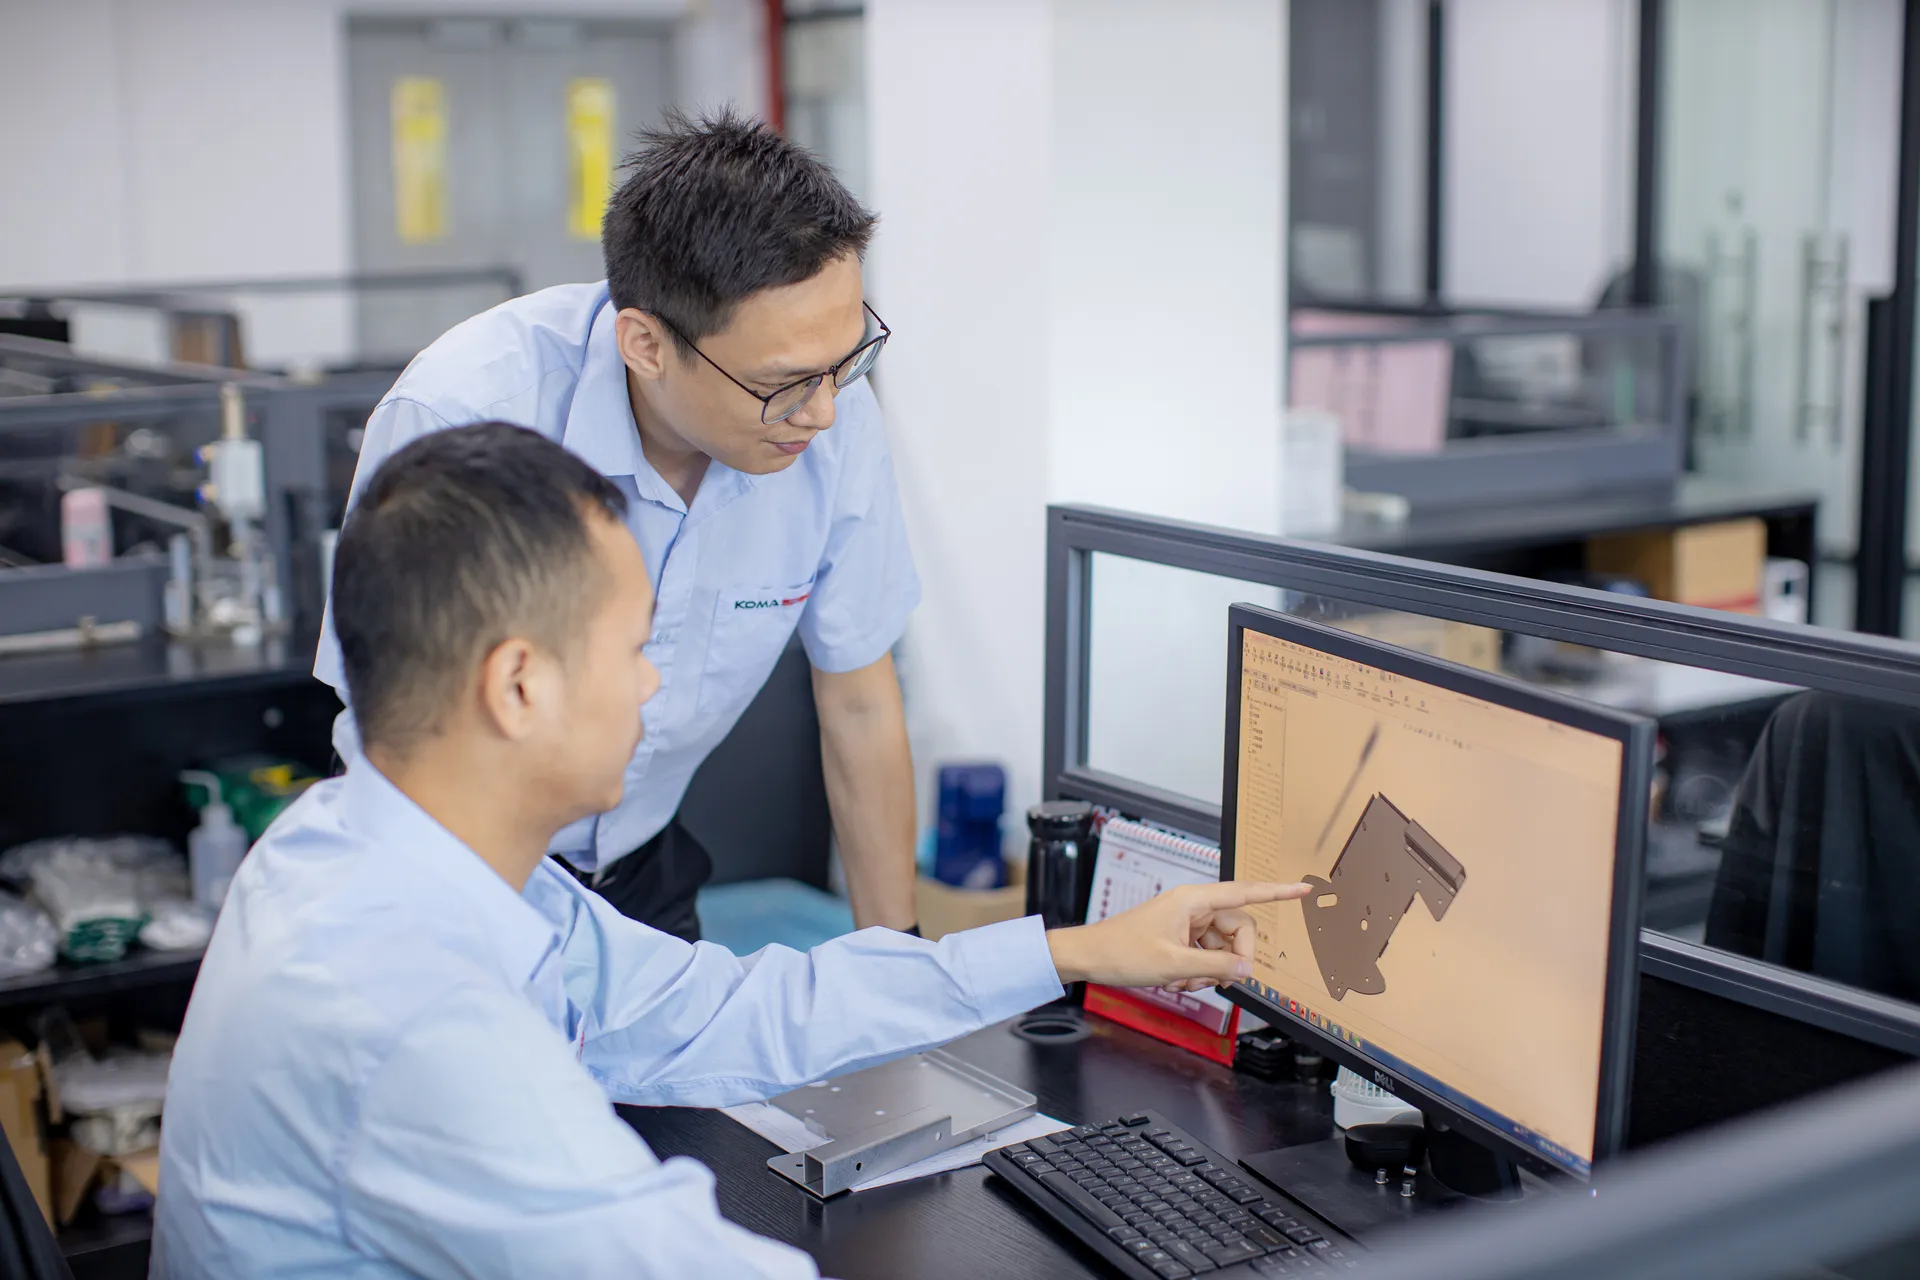
- Supplier validation: Leverage your partner's domain expertise to identify process improvements and geometric simplifications your team may have overlooked.
The companies that get the best results with their DFM reviews treat the process as a collaboration between the design team and their chosen manufacturer. So, remain open to input regarding alternative processes or material adjustments.
An experienced engineer can spot areas where savings could be made or improvements could be implemented but were overlooked at the design stage. That is because he dealt with these (or similar) situations many times before – which cannot be said about every design team.
By viewing your manufacturing partner as an extension of your own company, you are taking advantage of these particular skills that they possess to optimize your designs.
This is one of the reasons why choosing a competent manufacturer is such a critical part of the product development process.
Design for Manufacturing Principles Checklist
View Design for Manufacturing as a continuous process to ensure that your design is production-ready.
Follow the checklist below to address potential obstacles to your project — but note that those are general guidelines that do not substitute the inputs from your manufacturer.
Also note that, depending on your chosen manufacturing methods, more specific steps are necessary, e.g. defining draft lines and uniform wall thickness for plastic molded parts.
- Define functional requirements and product architecture.
- Match manufacturing processes to your projected production volume.
- Eliminate non-essential parts and consolidate components into single modules.
- Standardize fasteners, hole sizes, bend radii, and wall thickness across the design.
- Use standard material grades, plate thicknesses, and bar stock diameters.
- Reserve tight tolerances for critical mating interfaces only.
- Conduct worst-case tolerance stack-up analyses across multi-part chains.
- Match finishes and material choices to the actual operating environment, including temperature, humidity, and chemical exposure.
- Add self-aligning features such as tabs, slots, and dowel pins to simplify assembly.
- Establish a GD&T datum structure based on accessible physical features used during manufacturing.
- Specify surface roughness only on faces with critical mechanical interactions.
- Minimize secondary operations by designing parts to come out of primary manufacturing in a near-finished state.
- Consult your manufacturer early to identify design and material constraints.
- Validate geometry with rapid prototypes to uncover ergonomic and tool-access issues.
- Update designs immediately when prototype testing reveals performance failures.
- Hold regular cross-functional reviews to address supply chain and production risks before tooling release.
Bring Your Designs to Life with Komaspec
Komaspec engineers review every new design before it goes to production — checking for cost drivers, error-prone features, and anything that will not translate cleanly to manufacturing in your desired volume.
That review covers component geometry, material choices, locally available parts, and assembly reliability. The same team stays involved through production, which is how design problems get caught at the stage where fixing them is still cheap.
Request a quote to discover how we can reduce your production costs before your design is locked in.
FAQs
When should you use DFM?
DFM should be introduced at the conceptual design stage, before geometries are locked in or raw materials are purchased. If you apply DFM principles earlier, then the cost of making changes is cheaper. A design change made during the drafting phase can cost up to one hundred times less than the same change after tooling has been released.
Is product quality affected when DFM is applied?
No. DFM is not a matter of taking shortcuts — it is a matter of insuring that each design requirement has a clear functional purpose. When tolerances, materials and finishes are adjusted to actual performance requirements rather than conservative overspecification the factory can operate at its maximum precision. That leads to a more stable, repeatable manufacturing process which normally translates to better consistent quality not worse.
What is Tolerance Stack-up and Why is it important in DFM?
Tolerance stack-up is the accumulation of dimensional variations of multiple parts in an assembly. When each part is at the edge of its allowable tolerance, these small deviations can accumulate and push the final assembly out of its functional requirements. DFM addresses this with worst case stack up analysis and use of tight tolerances only where really required reducing the probability that normal manufacturing variation will cause assembly failure.
What is the role of the manufacturer in the DFM process?
The manufacturer is a key partner, not just a downstream implementer. Bringing them in early allows your team to leverage their knowledge of machine capabilities, locally available materials and process limitations that no design software can replicate. Suppliers have often made similar parts many times before and can often see ways to simplify the geometry or substitute materials to reduce costs without affecting function. One of the most common and costly DFM errors is to keep manufacturers in the dark until a design is frozen.
What is a DFM review and how do you do it?
This usually involves the design team, manufacturing engineers and the supplier and is done at set milestones before drawings are released. The review discusses part geometry, tolerance specifications, material choices, assembly logic and some secondary operations. Findings are documented and action items are tracked to ensure all risks are resolved before tooling is committed.