
- Key Takeaways
- What Is a Brushed Metal Finish?
- How the Brushing Process Works
- Brushed Finish by Grit
- Brushed Finish by Grit
- Does Grit Tell You Roughness?
- Brushed vs. Other Finishes
- Brush the Sheet or the Part?
- Designing for a Brushed Finish
- Corrosion Protection
- What Affects the Cost?
- How to Specify It
- FAQs
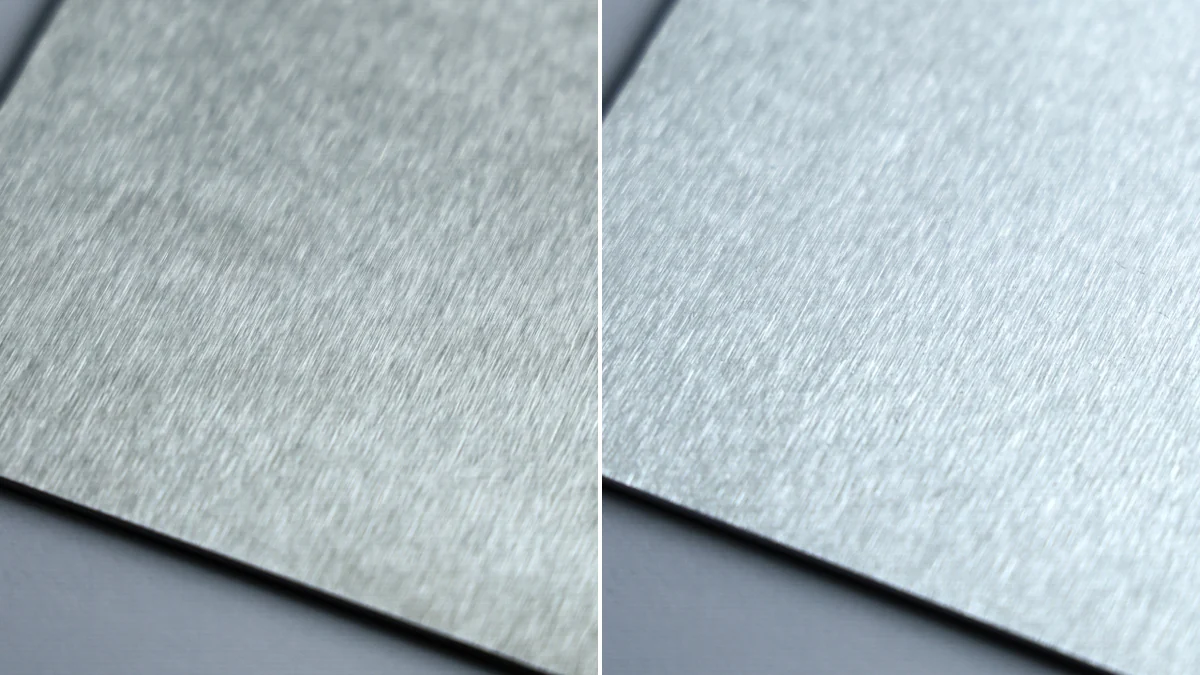
A brushed metal finish on stainless steel or aluminum is a fine, unidirectional pattern cut into the material’s surface. It can be achieved using abrasive brushes, pads, or belts. How fine the lines look will depend mostly on the grit level of the abrasive used for the final pass.
A brushed surface is used to make large panels appear flatter, give the material a low-gloss satin look, or create a surface that is easy to maintain (compared to mirror or bright mill finishes).
While it’s a relatively simple concept, getting it right can be challenging. This guide will cover common issues you might run into, including making sure that all panels on the production line have a consistent appearance, getting the weld to match the flat, and ensuring that an anodized part comes out looking like the approved sample.
Key Takeaways
No. 4 refers to the process used for creating the surface finish, not the resulting surface. That’s why No. 4 panels from different suppliers don’t always match.
Don’t just specify grit. Use a signed reference sample to specify your part’s appearance and designate a roughness (Ra) limit to specify corrosion performance.
Stainless steel loses some of its corrosion resistance after getting a brushed finish, but passivation can restore that resistance without affecting its appearance.
Anodizing an aluminum part won’t cover up the brush marks, so the brushing has to be right before it goes into the tank.
Table of Contents
- Key Takeaways
- What Is a Brushed Metal Finish?
- How the Brushing Process Works
- Brushed Finish by Grit: Stainless Steel vs. Aluminum
- Does Grit Tell You the Surface Roughness?
- Brushed vs. Polished, Satin, and Bead-Blasted Finishes
- Should You Brush the Sheet or the Finished Part?
- Design Parts for a Brushed Finish
- Corrosion Protection for Brushed Stainless Steel and Aluminum
- What Affects the Cost of a Brushed Metal Finish?
- How to Specify a Brushed Finish on Your Drawing
- Frequently Asked Questions
What Is a Brushed Metal Finish?
It is a mechanical finish applied to metal surfaces. A brush or similar tool is used to abrade off some of the material, creating parallel scratches (the “grain”) that scatter light.
Unlike most other finishes, this one does not involve any coating.
Because the finish is applied directionally, a skilled operator can blend welds and service damage back into this finish. This is particularly useful since, as the ASSDA points out, this can’t be achieved on a 2B mill finish and is difficult to do on bright annealed (BA) sheet.
Stainless steel and aluminum use different naming systems for brushed finishes, and stainless steel has separate US and European designations:
| Designation | Standard or system | What it means |
|---|---|---|
| No. 3 | ASTM A480 (US) | Coarser directional finish (50 to 80 grit) |
| No. 4 | ASTM A480 (US) | General-purpose brushed finish (100 to 180 grit); Ra usually up to 0.64 µm (25 µin) |
| 2G | EN 10088-2 (Europe) | Ground, coarse finish, used for interiors |
| 2J | EN 10088-2 (Europe) | Brushed or dull polished appearance |
| 2K | EN 10088-2 (Europe) | Satin polish (Ra 0.5 µm or less) for marine and exterior use |
| AA-M32 | Aluminum Association | Medium satin, directionally textured |
| E2 | EURAS (anodizing) | Brushed surface, then anodized |
The grit ranges on this table come from CELCO’s finish designation guide. The roughness limits and EN classes are from the Australian Stainless Steel Development Association (ASSDA) and the Euro Inox Guide to Stainless Steel Finishes.
The ASSDA notes that the No. 4 designation refers to the process used to create the finish, rather than the resulting appearance. So there may be variations between suppliers, or even across the life of a single abrasive belt.
How the Brushing Process Works
For stainless steel, it usually starts with a sheet or coil that has a 2B surface (smooth, cold-rolled mill finish). The material is then brushed on machines with wide belts. If the brushing is done on welds, formed parts, or small batches, operators may use hand-held belt sanders, non-woven pads, or flap wheels instead.
To achieve the right look, operators use brushes or pads with progressively finer grits. That way, the finer pad removes the scratches the coarser one left behind. This gradual process is important for the final result. If you brush the surface with 80 grit and then jump to 320 grit for the next pass, the deep scratches left by the first pass will still be visible. To avoid this, the ASSDA says to never skip more than two sizes when moving through different grit levels.
The look of the brushed surface will also depend on belt speed, belt wear, and how much pressure is applied during abrasion. Mills often use wet processes (flooding the strip with oil), which the ASSDA says gives a finer, more uniform surface. Euro Inox also notes that wet-ground finishes are more consistent from batch to batch.
Abrasive pads or brushes used for stainless steel should be used exclusively for stainless. A belt that has been used on carbon steel can carry iron particles. Those particles could then get embedded into stainless steel, causing it to form orange rust spots within weeks.
Flat blanks can also be brushed after they are laser-cut (but before bending), and some automatic deburring machines have a brushing module that can accomplish this (see our guide to mechanical surface finishing for sheet metal).
Brushed Finish by Grit: Stainless Steel vs. Aluminum
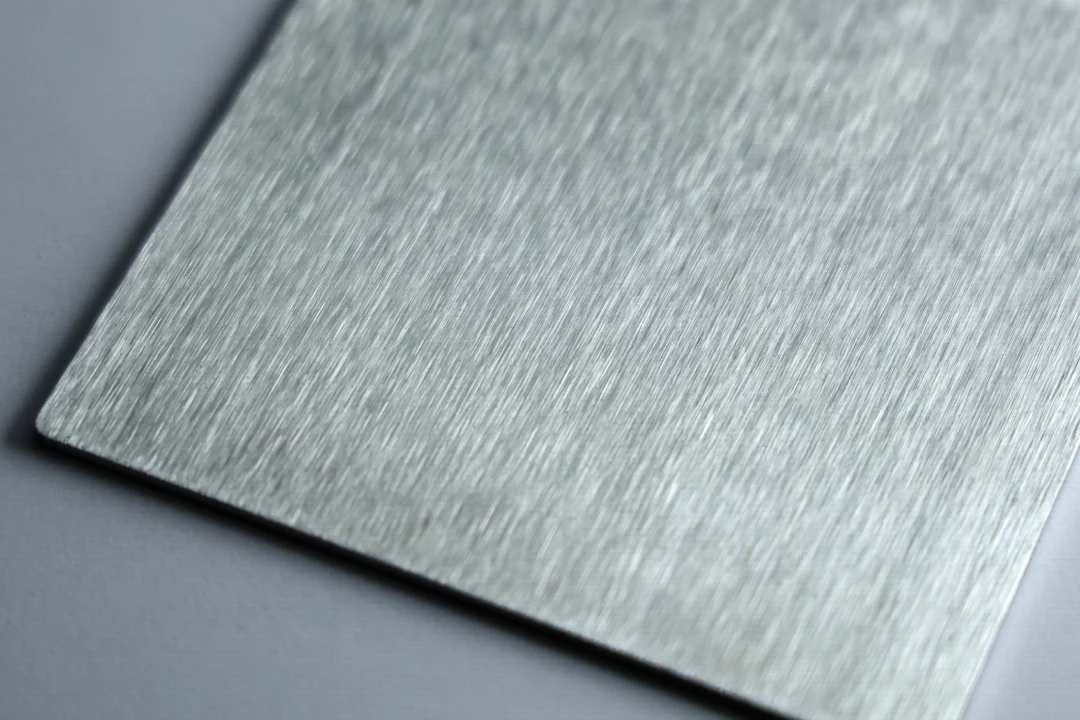

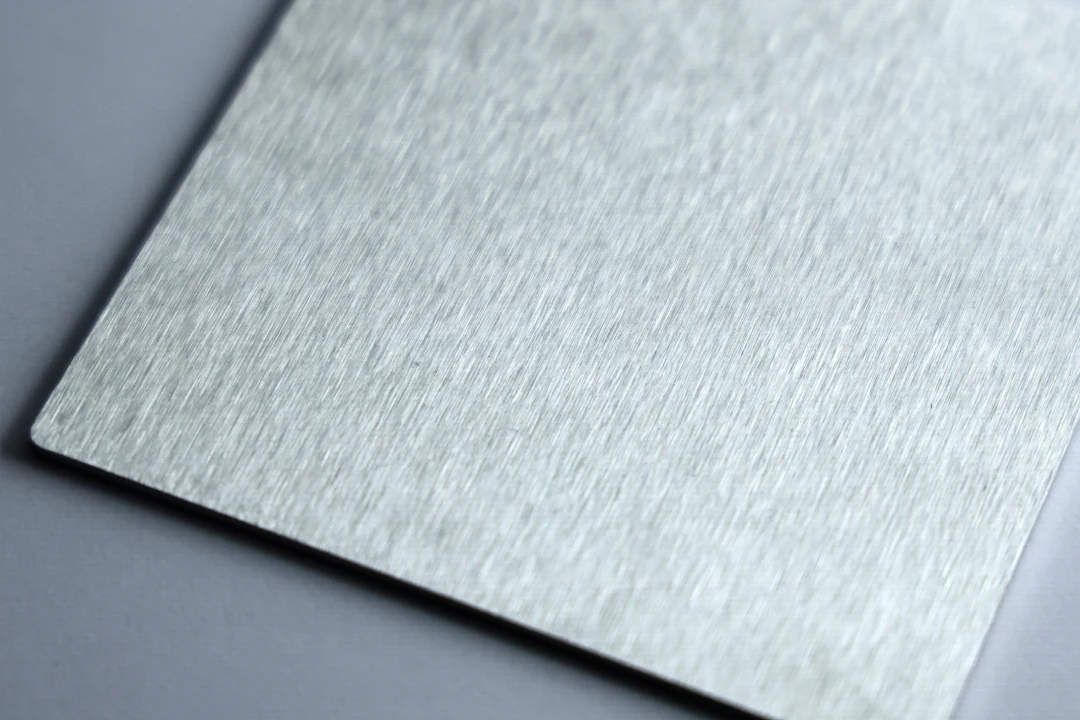

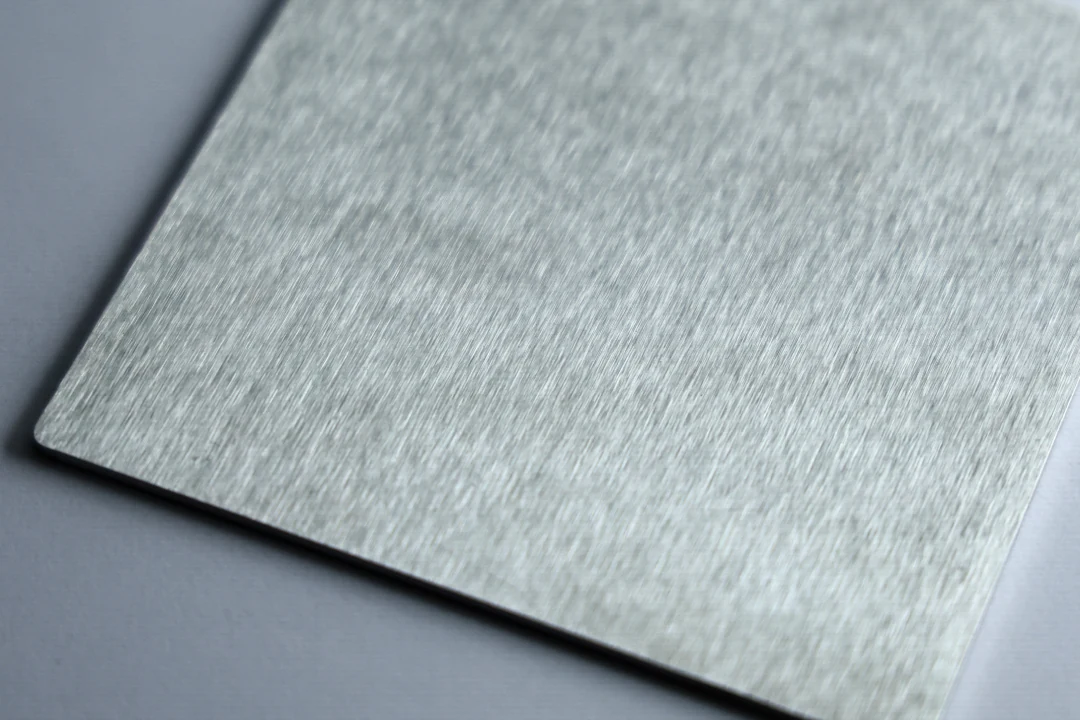
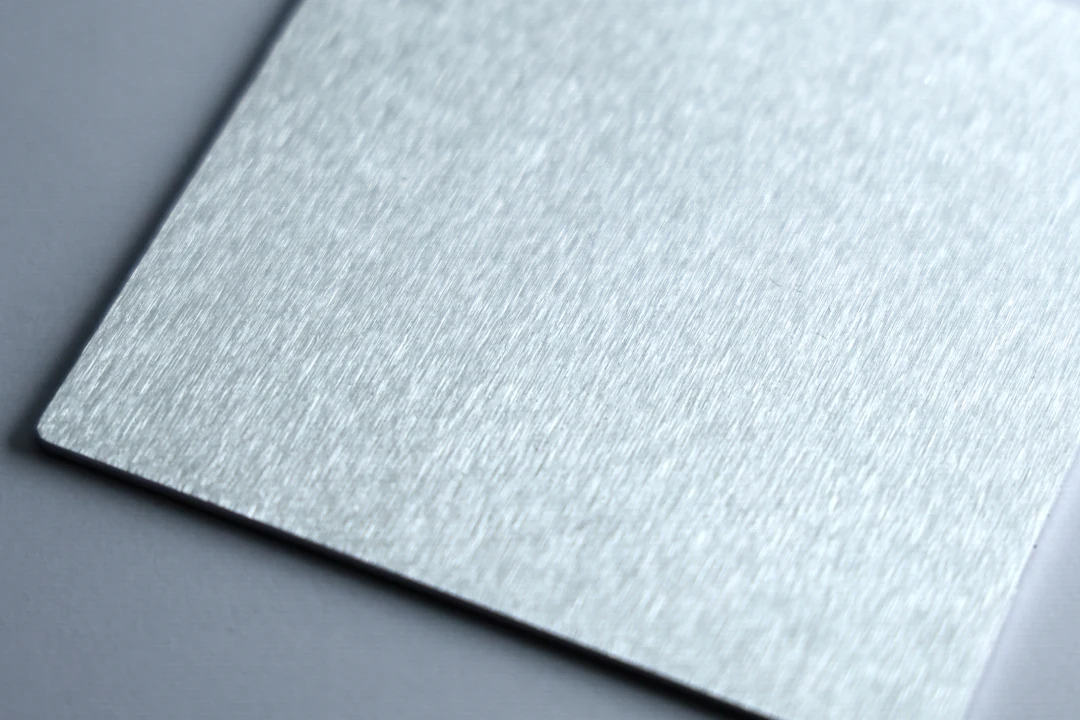
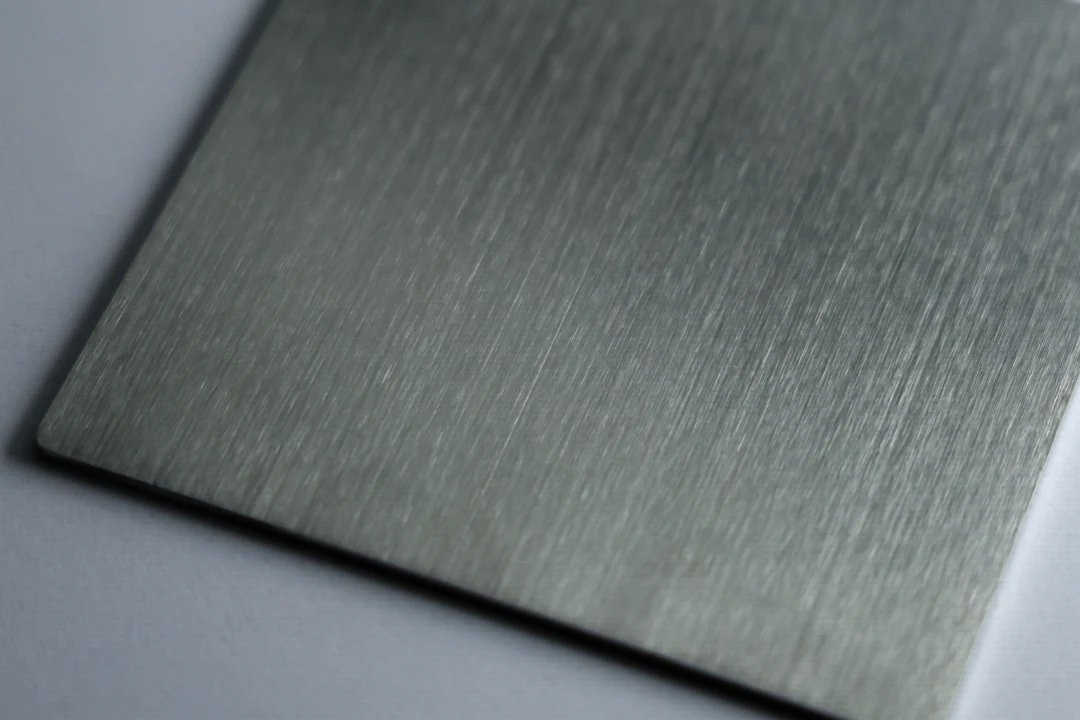
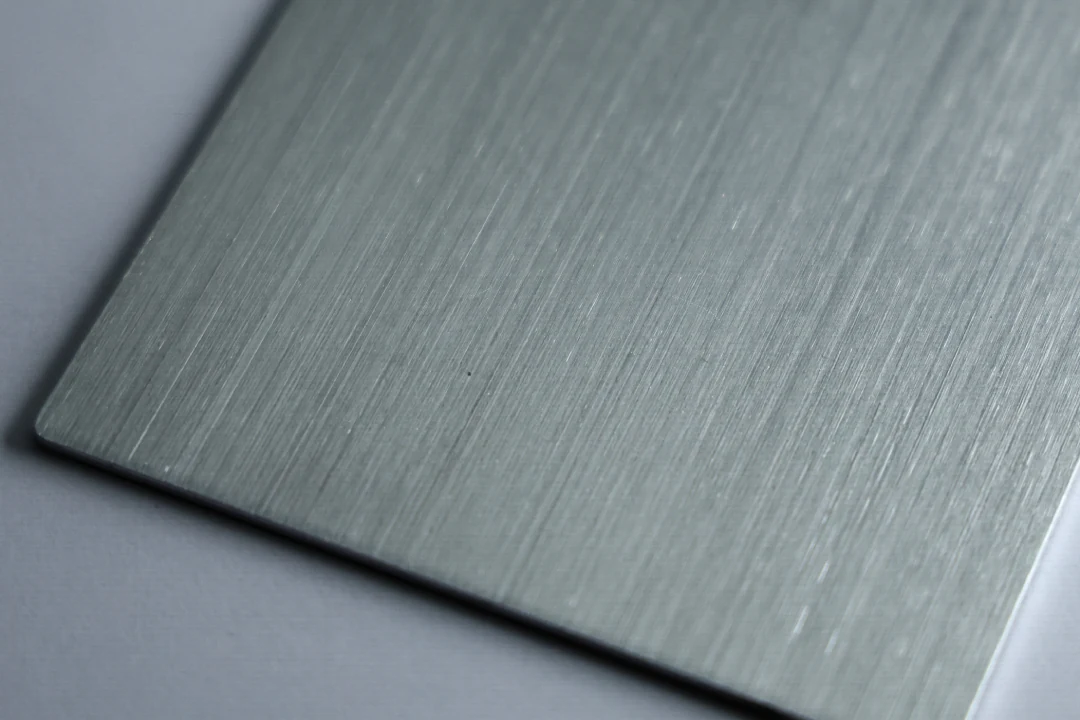

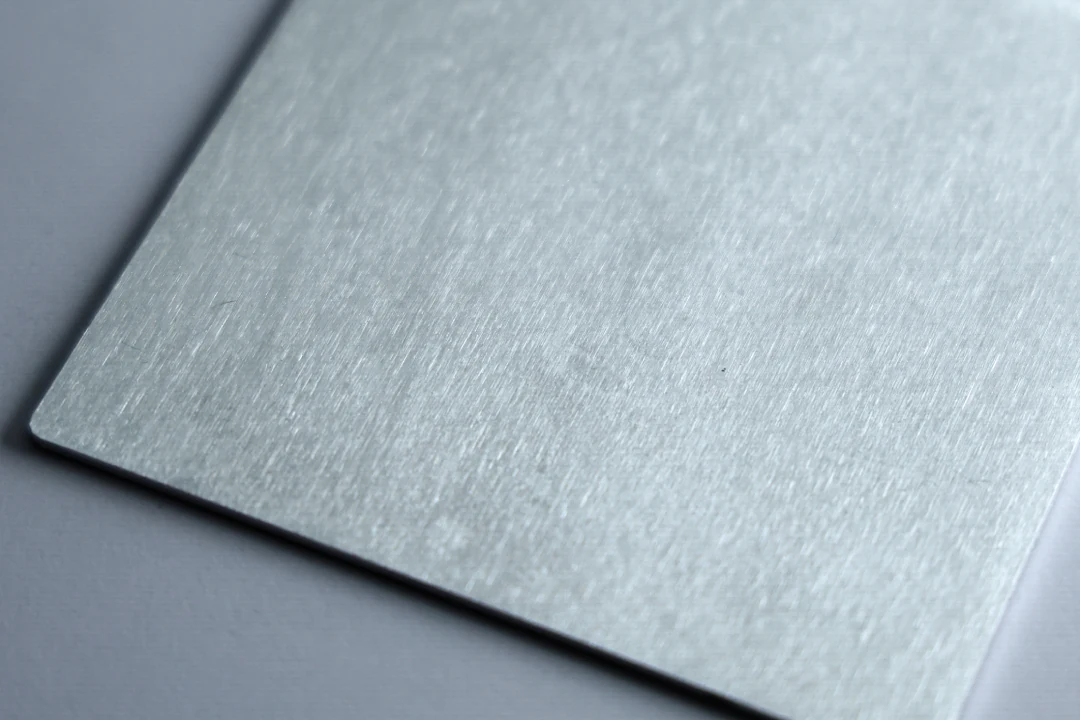

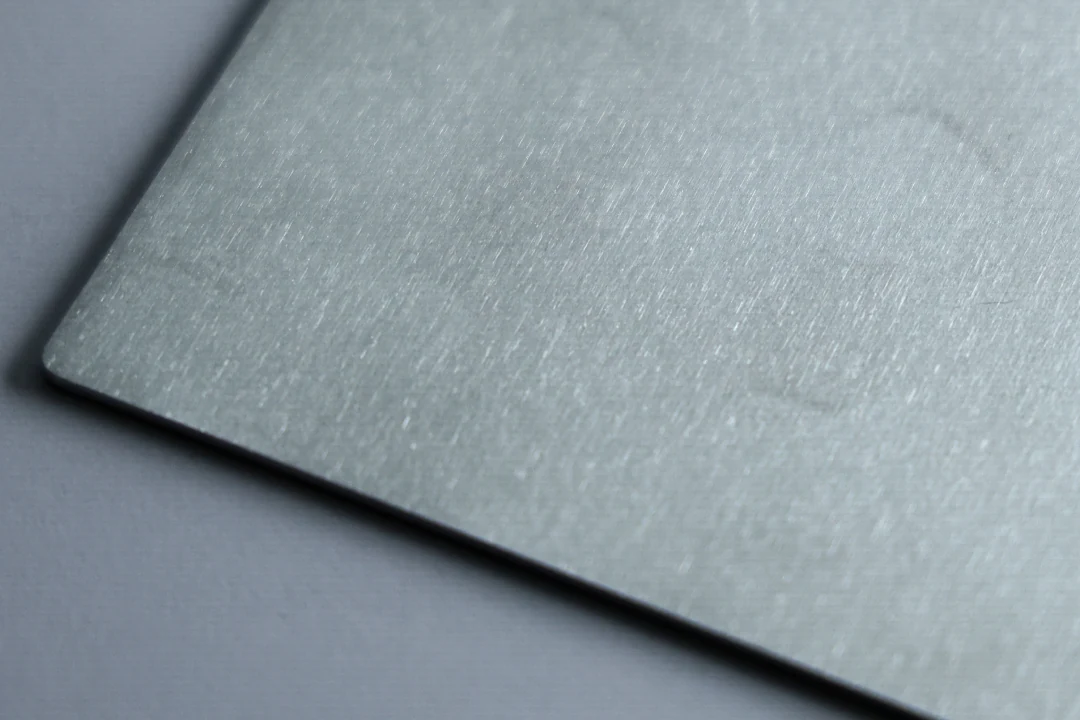
Brushed stainless steel (left) and aluminum (right) at six final grits (80 to 600). The lighting and camera angles vary between shots, and the 240-grit pair came out darker with stronger line contrast, so compare the line texture, not the tone or brightness.
On a brushed surface done using 80 grit, you can see the scratch lines when standing near the part. Once you get to 120 grit, the scratches start blending in better and you get the look most people think of when they picture brushed metal. Once you get all the way up to 600, the lines are blended so well that the surface has a fine satin appearance, with the lines only visible when seen at an angle.
In these photos, the aluminum surfaces came out looking whiter than the stainless surfaces. So panels made of stainless and aluminum won’t match, even if they were brushed using the same grit.
| Final grit | Estimated Ra | Nearest standard finish | Surface appearance |
|---|---|---|---|
| 80 | ~1.8 µm | No. 3 | Coarse, with visible lines |
| 120 | ~1.3 µm | No. 4 | Clear brushed grain |
| 180 | ~0.76 µm | No. 4 | Even grain with finer lines |
| 240 | ~0.38 µm | Finer than a typical No. 4 | Fine grain |
| 320 | ~0.30 µm | Satin range | Soft, low-contrast grain |
| 600 | ~0.13 µm | Pre-polish step | Near-uniform satin |
The roughness estimates in this table are from MicroGroup’s grit-to-Ra chart (600 grit from Engineering ToolBox) and they are published estimates, not measurements of the samples shown above.
So what’s the right choice in practice? For visible panels or indoor enclosures, default to a final grit within the No. 4 range. This will create a general-purpose brushed look, and the ASSDA says it’s the easiest finish to maintain. Only go with a finer grit on parts that will be kept outdoors or used in coastal applications, since it will create a smoother surface with better corrosion resistance.
Does Grit Tell You the Surface Roughness?
Grit only gives you a loose approximation of surface roughness. You can see this imprecision when you compare different sources. On the grit charts, 180 is around 0.76 µm, which is above the 0.64 µm limit defined for No. 4. And yet CELCO lists 180 as a No. 4 grit. And the ASSDA’s trace of a typical No. 4 measures at 0.41 µm.
Why the variation? It’s because of differences in the process. Belts have their own degree of wear, different grit combinations can be used to brush the surface, and equipment or operators can apply varying amounts of pressure. So the same grit can yield different results, which is why specifying grit isn’t the best way to ensure a part has the right roughness.
That being said, roughness isn’t the best way to achieve a specific appearance. According to the ASSDA, there is only a moderate correlation between Ra and the way a surface looks, and two panels can look substantially different even with the same Ra.
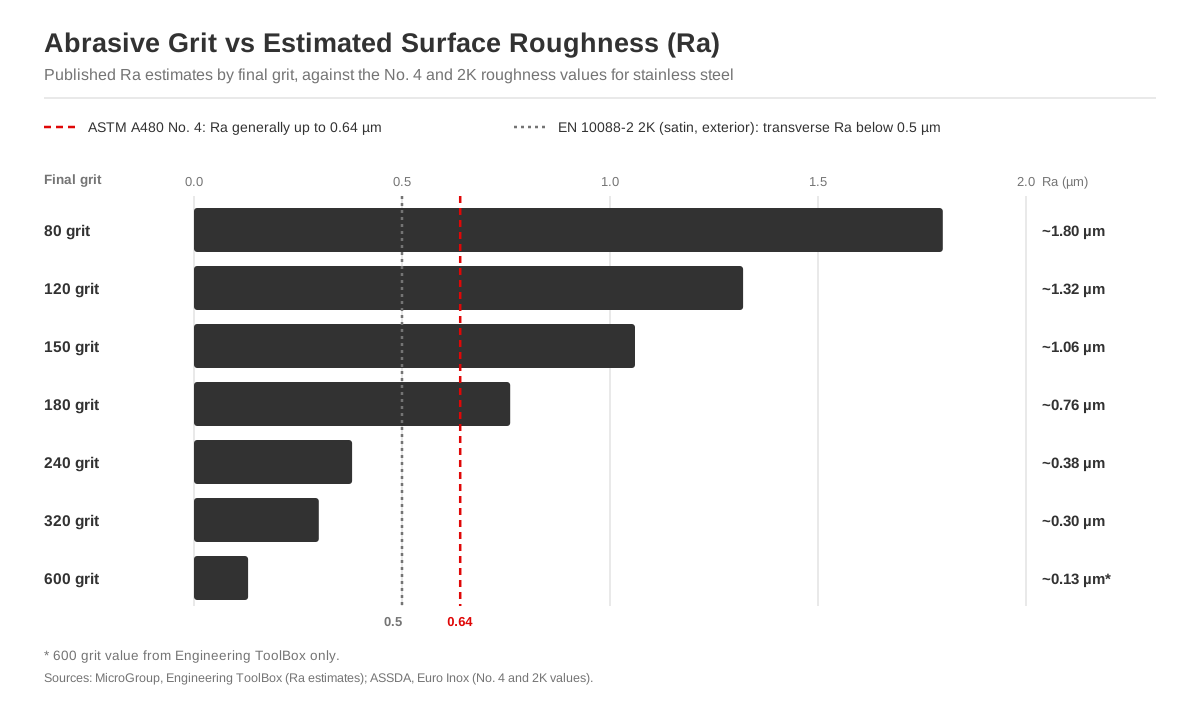
In our case, we use Ra as a performance value, but rely on a physical sample for surface appearance. If your surface needs corrosion resistance, specify an Ra limit on the drawing (0.5 µm or less for outdoor stainless, in line with EN 2K). But to get the desired appearance, approve a reference sample that can be used as a standard for the finished look.
Brushed vs. Polished, Satin, and Bead-Blasted Finishes
| Finish | Look | Can welds and damage be blended in? | Typical application |
|---|---|---|---|
| Brushed (No. 4, 2J) | Directional grain, low gloss | Yes, by a skilled operator | Enclosures, visible panels, work surfaces |
| Satin polish (2K) | Finer, smoother grain | Yes, but requires more care | Outdoor and coastal stainless |
| Mirror polish (No. 8) | Reflective, no visible grain | Only by re-polishing the area | Decorative parts |
| Bead-blasted | Non-directional matte | Locally | Uniform matte look, or a key for paint |
| 2B mill finish | Smooth, moderately reflective | No | Hidden or internal parts |
| BA (bright annealed) | Bright, mirror-like | Yes, but it’s difficult | Bright trim without visible welds |
Suppliers will sometimes use “brushed” and “satin” interchangeably, but these are different types of finishes with distinct applications. A part with an EN 2K satin finish has a roughness limit (Ra 0.5 µm or less) and is intended for exterior and marine use, while a 2J brushed finish has no roughness limit at all.
Should You Brush the Sheet or the Finished Part?
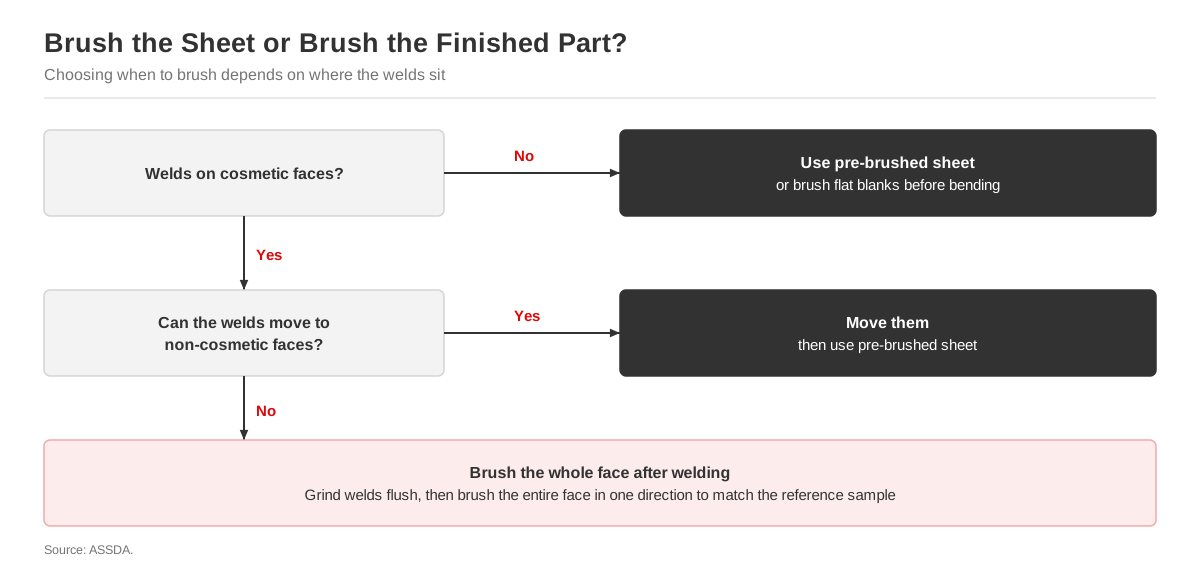
It mainly depends on whether your part will have welds on its cosmetic surfaces.
Pre-brushed sheet comes with a protective film already applied. Then it gets cut, bent, and assembled.
It’s usually the cheaper option and the flat areas of the sheet will have a more consistent appearance. But anything that disturbs the surface will become a weak point, especially welds.
ASTM A480 states that skilled operators are usually able to blend a No. 4 finish. While that’s true, it won’t always get you the same exact appearance. According to the ASSDA, to get an exact match you would need to replicate the process used for brushing the rest of the surface. So if you’re using pre-brushed sheet, expect blended welds to have a slightly different appearance than the sheet around it.
Brushing after fabrication is another option, but it comes with labor costs. And belts won’t be able to reach every surface, so short flanges, recesses, and inside corners will usually end up looking different from the flat, open faces.
If your part doesn’t have any welds on its cosmetic faces, we recommend going with pre-brushed sheet (or brushing flat blanks before bending them). Or if you can move the welds, place them on non-cosmetic faces so they won’t have to be blended in.
For cosmetic faces where welds can’t be avoided, grind the welds flush and brush the entire face after the welding is done, then finish the surface so it matches the reference sample. If you blend welds into pre-brushed sheet instead, the ASSDA recommends 80 and then 120 grit (plus 150 if needed), with the final passes along the original grain.
Design Parts for a Brushed Finish
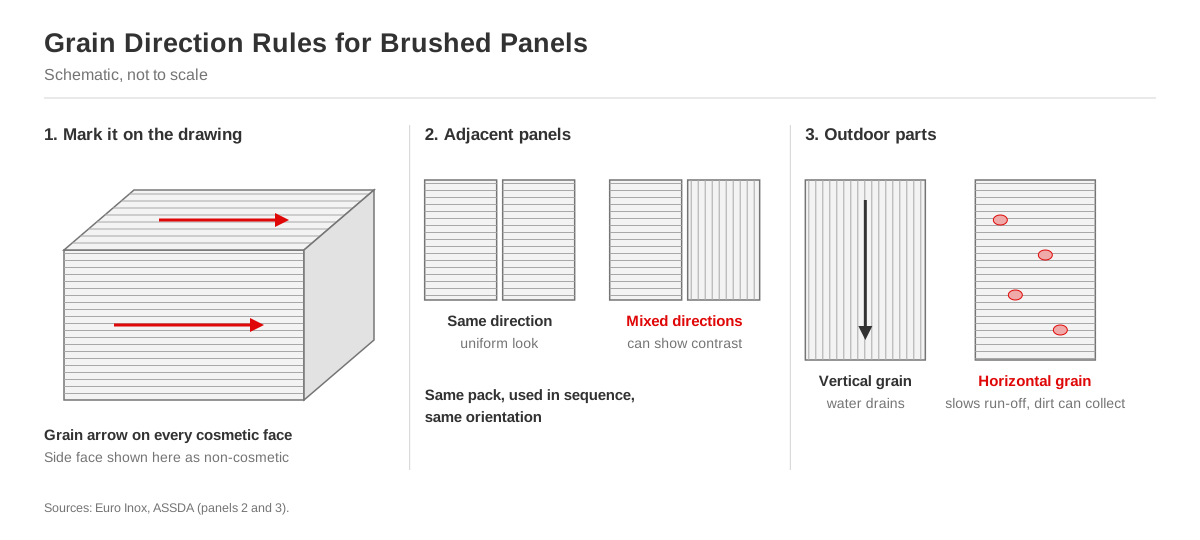
Use an arrow to specify the direction of the grain on every cosmetic face. According to Euro Inox, grains brushed in different directions will create a visible contrast between panels. They recommend marking the direction on the underside or the packaging so this specification survives fabrication and installation.
Be aware that parts with fixed grain directions can be more difficult to nest efficiently. Because the part can’t be rotated on the sheet to find the optimal placement, large or awkward panels can end up using more material.
If you have two panels that will sit next to each other, the ASSDA advises making them from sheets that come from the same pack, keeping the panels in the same orientation (so the grain goes in the same direction), and using them in sequence. Otherwise, you risk having panels that look different when they’re placed side by side.
For any product that will be used outdoors, make sure the grain runs vertically. Both the ASSDA and Euro Inox indicate that vertical grain does a better job draining rainwater compared to horizontal grain.
Specify a protective film as well. Laser-grade films will stay on during the cutting, bending, and punching but then peel off cleanly (in fact, Novacel makes grades specifically designed for lightly brushed finishes). Make sure the film doesn’t stay on too long. The ASSDA warns standard PE film can bake onto stainless steel if it’s left in the sun for more than a week or two, and the glue could cause discoloration.
Corrosion Protection for Brushed Stainless Steel and Aluminum
For stainless steel, a No. 4 finish usually has worse corrosion resistance than a 2B or BA mill finish on the same grade. That’s because abrasion exposes sulphide inclusions and multiplies the vulnerable surface area. Electrochemical test results published by the ASSDA show that corrosion accelerates at Ra levels above 0.5 µm. You could upgrade from 304 to 316, but that won’t always solve the problem. In aggressively corrosive environments, brushed 316 can actually corrode faster than 304 with a mill finish.
Passivation (to ASTM A967) is a better solution. It will restore the part’s corrosion resistance without affecting its appearance. When designing outdoor parts, treat passivation as an extra step in the brushed finish process, not an optional add-on.
If your part has brushed stainless that will come into contact with other metals, see our guide to galvanic corrosion for more advice.
For aluminum, brushed surfaces are commonly clear anodized (as in EURAS class E2). The Aluminum Anodizers Council stresses that the mechanical finishing comes first and that anodizing won’t hide any of the resulting texture. Anodizing also changes the surface slightly. According to Products Finishing, Type II anodizing raises Ra by about a third to a half, so the part will look a bit more matte compared to the bare sample.
The specific alloy used will affect the color of the surface. The Anodizers Council says that 5005 and 6063 aluminum will come out clear silver, while 5052 (a common sheet alloy) can turn slightly yellowish in thicker coatings. So if parts made from brushed aluminum will sit next to extruded or machined parts, approve the anodized samples of each alloy together to make sure they look right.
What Affects the Cost of a Brushed Metal Finish?
Smoother finishes require more passes. So it takes longer to brush a surface to 320 grit than it does to 180.
Welds on cosmetic surfaces may need to be hand-blended, which can make a significant difference to the final cost.
Specifying the direction of the grain makes it harder to nest the part efficiently, which could result in more material waste.
The film and packaging used to protect cosmetic faces during shipping are another added expense.
Some brushed parts will also need to be passivated or anodized, which adds lead time and another process step.
How to Specify a Brushed Finish on Your Drawing
Use this checklist when preparing your drawings for an RFQ. Make sure to specify:
- Material, grade, and starting finish (e.g. 304 stainless from 2B mill finish, or 5052-H32 aluminum).
- Designation and final grit (e.g. No. 4 with 180 grit, or EN 2J).
- Cosmetic faces (the other faces can stay mill finish instead of being brushed).
- Grain-direction arrows for every cosmetic face.
- An Ra limit (e.g. Ra ≤ 0.5 µm) for parts that need corrosion resistance.
- Welds on cosmetic faces that will need to be blended so they match the surface around them.
- Post-treatment (e.g. passivation to ASTM A967, or anodizing type and class).
- Protective film (laser-grade) and when it gets removed (and who removes it).
- For parts where the appearance matters: a signed reference sample that will be held by both the customer and manufacturer (with agreed viewing distance and lighting).
That last detail should be part of the cosmetic standard that gets settled before the engineering prototype build (which is covered in our guide to EVT, DVT and PVT).
Komaspec offers brushed finishes on stainless steel and aluminum, alongside passivation, anodizing and other surface finishing options. Send your drawings (with the cosmetic faces marked) and our engineering team will review grain direction, weld placement, and finish sequence before quoting. Request a quote.
Frequently Asked Questions
What is brushed stainless steel?
It is stainless steel where the surface has been abraded in one direction, leaving a fine, parallel grain. It is usually specified as No. 4 in the U.S. (under ASTM A480), which generally has a roughness of up to 0.64 µm Ra. In Europe the closest specifications are 2J (brushed) and 2K (satin, Ra 0.5 µm or less).
What is the difference between brushed and polished stainless steel?
Brushed stainless steel has a visible directional grain and a satin sheen, while polished stainless (e.g. No. 8 mirror finish) is buffed using finer grits and leaves no visible grain. Brushed surfaces also have lower gloss, are easier to maintain, and allow operators to blend welds back into the surface. Polished stainless is more difficult to repair but creates a more visually appealing surface.
Is a brushed finish the same as a satin finish?
No. The European standard places them as two separate classifications: 2J for brushed or dull polished finishes with no roughness limit, and 2K for a satin polish with Ra of 0.5 µm or less (which is intended for marine use or outdoor parts). If a supplier quotes you for “satin” finish, ask exactly which type of finish they mean.
Does brushed stainless steel rust?
It can, especially when kept outdoors. That’s because brushing the surface will roughen it and compromise its corrosion resistance. Iron particles from abrasive tools that were previously used on carbon steel can also become embedded in the stainless steel surface and cause it to form rust spots. The best way to reduce corrosion risk is to passivate brushed stainless to ASTM A967, give it a smooth final finish, and ensure the grain is vertical (which drains water better than a horizontal grain).
Can you anodize brushed aluminum?
Yes. In fact, brushing followed by clear anodizing is a standard combination, classed as E2 under EURAS. Brush the surface before anodizing, because anodizing won’t conceal any of the lines or scratches left on the surface. Type II anodizing also slightly raises the surface roughness, which gives the part a bit more of a matte appearance.
How do you clean a brushed metal finish?
Wash it using a soft cloth with water and a mild detergent. Wipe the surface along the grain, then rinse and dry it. The ASSDA cautions against using steel wool or scouring pads that have come into contact with carbon steel, since it could introduce fragments that can cause rust to form on the surface. Abrasive pads should be avoided entirely because they can change the finish.