5 Key Design Tips for Laser Cutting DFM
Introduction to DFM for laser cutting
Laser cut parts seem deceptively simple when you review a typical drawing, but a poor approach to DFM (Design For Manufacturability) for laser cutting can result in higher costs and quality issues. The key issue here is often a lack of knowledge of the key process considerations from the side of the typical engineer.
We’ll walk you through the five key design tips that will ensure you have designed a part as cost effectively and as manufacturing-friendly as possible. Komaspec also offers real-time laser cut part DFM analysis through their sister company Komacut which offers online sheet metal part quotation and ordering for its customers.
1. Is Your Part Actually Suitable for the Laser Cutting Process?
This is the first and most important question to answer when checking a laser cut part drawing – does it actually make sense to fabricate this part on a laser cutter?
Is the part too thick? Parts above 25mm (~1”) are often not suitable for cutting with a laser due to rough finishing, processing time or heat deformation.
Is the part too thin? Materials below a thickness of 0.5mm can be difficult to cut accurately on a laser cutter machine – part deformation or displacement can occur.
Are bezels, steps and other complex geometries required? Laser cutters cut straight edges –
Order and track sheet metal components online through Komaspec's on-demand sheet metal fabrication platform.
Consider the “kerf” and the Taper
The “kerf” is a term used to describe the void of material in the laser cut caused by the elimination or vaporization of material in the cut by the intense heat of the laser. The tolerances designed into the drawing should take account of the kerf width which will be material and laser type dependent.
Generally, the minimum kerf width should be expected to be at least twice the laser focal diameter. Select tolerances with this in mind. Factors such as laser power and cutting speed will also affect the kerf width.
Kerf is especially important to consider when you are designing assemblies with multiple laser cut parts: if one piece needs to nest in another, you need to add half of the kerf to the inner object and subtract the other half of the kerf from the outer part.

Fig. 2: Schematic of kerf-width top and bottom variance and te taper angle
Takeaway: The taper of a laser cut needs to be considered carefully in sheet metal above 15mm in thickness.
Hole Size – Not too Big, Not too Little
Laser-cut holes can neither be too big nor too small due to processing limitations. This will vary somewhat by the material being cut, but general rules as follows:
Minimum Hole Size – this is driven by the size of the beam (pierce point) and the thickness of the sheet metal being cut. In general, when the hole diameter is less than the material thickness the pierce point will often cause the hole to be out of tolerance.
Best Practice: hole diameter ≥ sheet thickness
Bare Minimum: hole diameter ≥ ½ sheet thickness
Maximum Hole Size
Best Practice: Area = (π (diameter)²) / thickness
Takeaway: Don’t get caught out - Don’t design holes that are too small or too big or your part may require extra processing via machining or tapping.
Consider Post-Cut Processing
Threading – thread cannot be added during the laser cutting process, so all threading is added as a post-processing step. This means threaded holes will generally need to be larger than the minimum hole thickness allowed by the laser cutting machine.
Bezels – laser cutters work straight up and down – no exceptions. Any bezels, angles or steps will require secondary processing. Eliminate any unnecessary features to avoid costly machining post-cut.
Edge Finishing – do your laser cut parts require highly polished edges or surfaces? As laser cutting can create dross on the edges, especially cutting very thick material, you may need to consider secondary polishing. Make sure to note finishing requirements on your drawing.

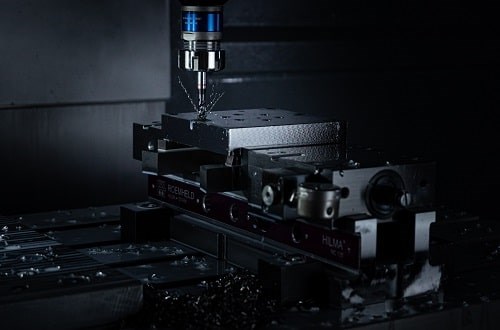
Fig. 3: CNC threading
Simplify Feature Numbers & Shape for Cost Savings
Greater processing time equals a direct increase in cost, so a couple of points to keep in mind:
A part designed with sharp corners can increase the cutting time because the laser head will have to decelerate as it traverses the corner. This can over-burn the corners also causing a dross build up. A larger corner radius, in general, will allow for increased cutting speed and part quality. A minimum part radius is R0.2, but greater radii generally translates to part cost reduction.
Parts with less intricate features (fewer holes, simpler geometry) translate to faster processing times and lower costs as acceleration and deceleration are less of a factor.
Takeaway: Minimize unnecessary features or complexity as much as possible avoid small radii to keep your laser cutting part cost down.
If you have any unanswered questions on sheet metal laser cutting, please follow the suggested links in this document to our proprietary literature which provide a wealth of information on many engineering and production topics. Happy reading!
Our team of engineers and technicians here at Komaspec have more than 20-years’ experience in sheet metal fabrication in China and are glad to review your product design together, and provide detailed design for manufacturability feedback and analysis to help you improve functionality and reduce manufacturing and tooling costs.
We are glad to review your product design together and help you select the fabrication process that best suits your product’s needs.